Elementor has emerged as a game-changer in the web design world, empowering web creators to shape their online vision without delving into complex code. The freedom to craft stunning websites with ease has made Elementor a go-to choice for many. However, this creative freedom comes with a responsibility to ensure that everyone, regardless of their abilities, can fully experience your Elementor-built website.
All too frequently, people with disabilities are presented with digital barriers when engaging with online environments. If designed without their unique needs in mind, your Elementor website will be partially or entirely inaccessible to a group that consists of upwards of 1.3 billion people.
In this blog post, we’ll delve into the essential steps for making your Elementor website accessible to individuals with disabilities. We’ll highlight the importance of web accessibility and demonstrate how creating an inclusive online space can yield positive results for both your website and its audience. Whether you’re an Elementor enthusiast, a developer, or a website owner, join us on this journey to unlock the full potential of your WordPress site and contribute to a more inclusive digital world.
How to make your Elementor website accessible
- Create an accessible navigation menu
- Add alternative text to meaningful images
- Ensure video content is accessible
- Implement a proper heading hierarchy
- Use sufficient contrast
- Ensure adequate text size
- Use descriptive link text
- Ensure online documents are accessible
- Use an accessibility plugin
What does having an accessible Elementor website mean?
To ensure that your Elementor website is accessible, it must be designed to cater to all visitors, regardless of their abilities. Achieving accessibility involves adhering to web accessibility standards. These provide specific instructions and guidelines for configuring your Elementor website to deliver an equal and inclusive user experience to all visitors.

The most prominent web accessibility guidelines are the Web Content Accessibility Guidelines (WCAG), established by the World Wide Web Consortium (W3C). These guidelines are recognized as the gold standard for web accessibility and have a significant influence on global web accessibility policies, as we’ll explore further in this blog.
To be considerded accessible, your Elementor website will need to adhere to WCAG, and we’ll dive deeper into what that entails later in the blog. You can press here to skip straight to that section.
How do you make your Elementor website accessible?
Add alternative text to meaningful images
Very often, images are used in websites and web-based applications to convey important, critical information. These types of images, called ‘meaningful images’ need to be made accessible to people with certain vision impairments who rely on assistive technology, such as screen readers. To that end, descriptive alternative text (or alt text) must be added to all meaningful images on your Elementor website. The alt text is a concise description within an image’s HTML tag, which, when scanned by screen readers, is read aloud to users, helping them understand the content of the image.
It should be stressed that alt text should be applied exclusively to meaningful images, and not to images that appear purely for decorative purposes. The latter category of images should remain hidden from assistive technologies, and one way of ensuring this is to keep their alt attributes empty.
When formulating alt text for product and service images on your Elementor website, focus on detailed descriptions, and provide a concise explanation of the information appearing within it.
It is advisable to limit your alt text to 80 characters or less. You can use this character calculator like this one to accurately gauge the length of your alt text.
How to add alt text to images in Elementor
To add alt text to an image in Elementor, follow these steps:
- Select on the image you want to add alt text to within the Elementor editor
- In the Image Box, media library-contained images will be displayed
- Look for the Alt Text option, which will appear on the right side of the window
Make sure meaningful video content has captions, transcripts, and audio descriptions
If your Elementor website features meaningful videos (i.e., the kind that provide critical, important information), they need to be made accessible to all viewers. To that end, they need to feature captions, transcripts, and audio descriptions.
Captions are essential for individuals with hearing impairments. They display on-screen text descriptions of essential video dialogue and sounds, enabling all visitors to follow and comprehend the video’s content.
Transcripts offer a textual representation of all spoken content and significant sounds in the video. They provide an alternative way to access video content, catering to those who prefer reading or are in situations where they cannot listen to audio.
Finally, audio descriptions enhance the experience for individuals with vision impairments. These narrations describe visual elements, including actions, settings, gestures, facial expressions, and other key visual details. Audio descriptions are inserted during audio pauses, ensuring that individuals with vision impairments can fully understand and enjoy the video without disruption.
Implement a proper heading hierarchy
Headings serve as the structure for your web content, much like chapter titles and subheadings in a book. They break down web page sections and subsections, progressing from H1 (the main title) to H6 (the least significant). This hierarchy creates a clear content organization.
For individuals relying on screen readers such as JAWS and NVDA, correct heading usage is critical. These tools assist users by indicating the location of specific headings on a page, enabling users to grasp how content is organized and flows.
Maintaining the correct order of headings is crucial. A H2 heading should precede a H3 heading, and skipping directly to a H4 header should be avoided.
In Elementor, you can use the Heading Widget to apply headings to a web page. You can press here to learn more about this.
Use sufficient contrast
Under WCAG 2.1 Level AA, there should be a contrast ratio of at least 4.5:1 between normal text and its background color, and 3:1 for larger text (18pt and above). You can use the Adobe Color Contrast Analyzer to measure contrast.
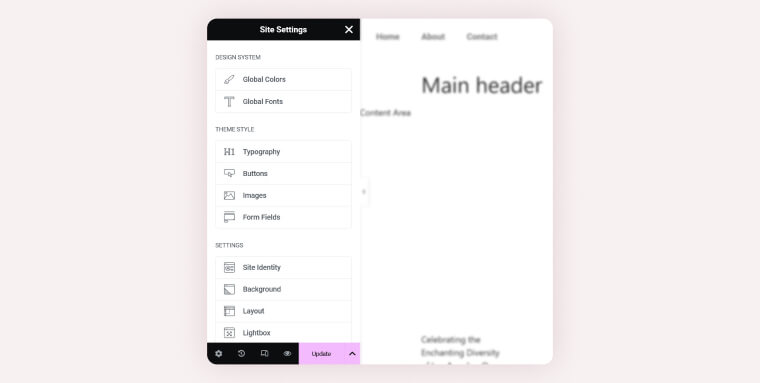
Elementor allows you to make a lot of global decisions about the design of your website elements in the Site Settings menu. You can access options for that through the hamburger menu inside the main Elementor interface.
Here’s how it looks in Elementor:
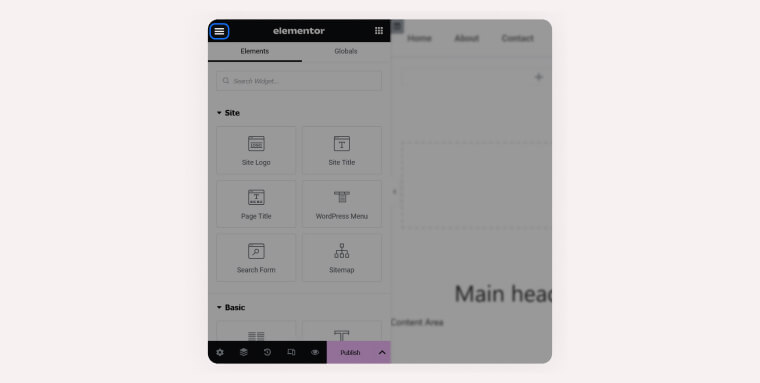
The Site Settings include things like global colors and fonts, typography styling, as well as buttons, background, header, and footer design.
You can use this to adjust your website design to ensure it is accessible to all visitors, including those with diverse abilities. Just be aware that you might have to disable default colors and fonts for some of your website elements for the changes to take effect.
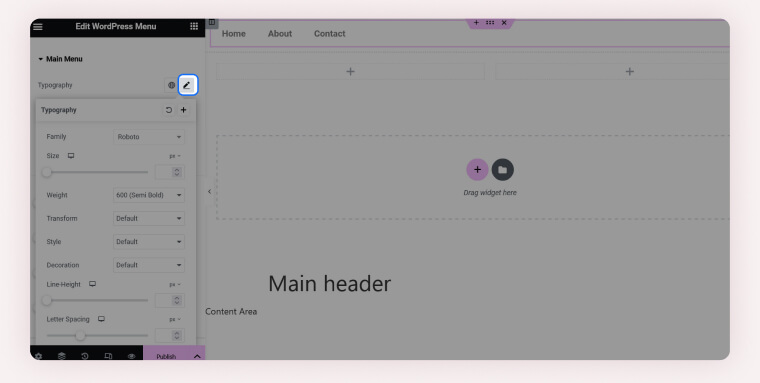
Make sure your text is large enough
Besides sufficient contrast, your fonts also need to be a large enough size to be readable. Go for at least 16px or 1em/rem. That’s another thing you can control in the Site Settings:
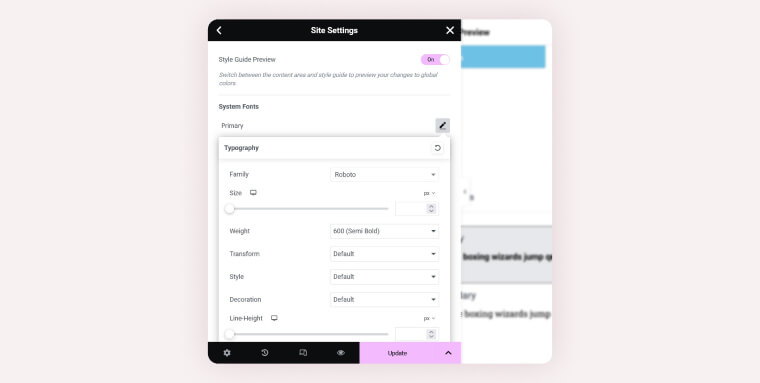
When you adjust the font size, be sure to use relative sizes. That means using units like em and rem, and not absolute sizes like px (pixels). Using relative sizes is good for responsive design as it makes it easier for people with vision impairments to adjust the default font size to their needs. Elementor has options for relative-size units built in, making it easy to make this part of your website accessible.
If you’ve been working with static font sizes so far, use an online calculator for converting them. You can learn more about this whole topic in our blog on accessible fonts.
Use descriptive link text
Every link, particularly menu items, should have a clear and concise label that accurately describes its purpose. This ensures all visitors, including those using screen readers, can clearly understand and grasp the destination and function of a link.
Ensure your online documents are fully accessible
If your Elementor website features online documents, such as PDFs and Microsoft Office documents (e.g., Word documents), they will need to be accessible to all users, including those with disabilities. For the most part, accessible online documents are those that are compatible with screen readers. And, for screen readers to effectively communicate the information appearing within them, online documents need to be properly tagged. You can explore the tagging process in greater detail by pressing here.
Furthermore, to meet accessibility standards, your online documents need to feature the other general web accessibility elements featured above, including, but not limited to:
- Readable text with a sufficient font size
- Adequate color contrast between the text and its background
- Alt text for meaningful images, if they are part of the document
- Descriptive link text, making navigation straightforward for all users
You can read more about the PDF accessibility testing process in this blog.
Accessibility issues existing within your online documents need to be addressed in a process called document remediation. The latter process can be challenging, time-consuming, and costly for website owners. Many Elementor website owners and designers therefore rely on expert service providers, such as accessServices, to remediate their online documents for them. With an intimate familiarity with relevant web and PDF accessibility guidelines, expert service providers are better equipped to handle these projects in a timely and cost-effective manner.
Tips for creating an accessible website navigation menu in Elementor
In ensuring your Elementor website is inclusive to all visitors, you need to pay special attention to the navigation menu. Navigation menus can prove very challenging for people who rely on screen readers and for those who navigate websites using a keyboard. With it being one of the main tools visitors can use to navigate your website, the navigation menu needs to be fully accessible and usable for all website visitors, including those requiring assistive technologies.
Elementor gives you a lot of possibilities to create and customize your own navigation menu via the WordPress Menu widget.
Be aware that, to take advantage of many of the features below, you need Elementor Pro.
Without further ado, here’s what you should pay attention to:
Pay attention to contrast, link text, and font size
The tips for general website accessibility above also apply to your navigation menu. To that end, you need to ensure that you are:
- Using descriptive link text for all links appearing in your menus
- Striking the proper contrast between text and its background within your menus
- Using font sizes that are large and readable within your menus
To ensure you are properly addressing color contrast and selecting accessible fonts, you can adjust those settings under the Style tab of your navigation menu:
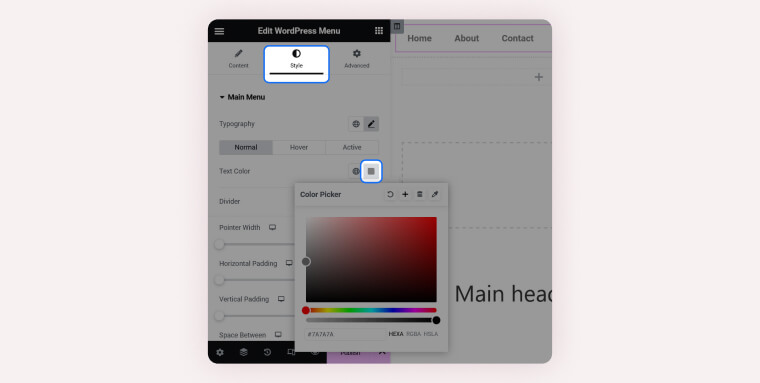
Here, you’ll find options to tweak text color and background color as well as adjust the font size as necessary:
These kinds of settings also exist for other page elements in case you need them.
Take advantage of ARIA markup
ARIA consists of a set of attributes that you can apply to the HTML markup of websites. It provides additional information about elements to assistive technologies, like screen readers. It helps define roles, states, and properties, making web content more navigable and interactive elements more understandable for users of assistive technologies.
If a web page is using proper semantic HTML markup like <main> and <header>, it is already navigable for screen readers. However, there are additional ARIA roles and attributes you can use to improve the accessibility of your website.
For example, a link representing the current page should have aria-current=”page” assigned to it. A navigation menu can have an aria-label=”” for more information about both the website and the navigation menu. Aria-expanded=”true” and “false” show whether a sub-menu is open or closed.
Assigning a landmark role in Elementor
A landmark role is a semantic attribute that helps identify and label specific sections or regions of a web page, improving its accessibility for users of assistive technologies. Ensuring the correct landmark role is assigned is crucial to providing clear navigation and context for people with disabilities, enhancing their overall browsing experience. Without the appropriate landmark role, users may face difficulties in understanding the structure of the page, potentially leading to navigation challenges and a less inclusive online experience.
There are two ways to assign the correct landmark role to the navigation menu. You can either make it a <nav> element or assign it role=”navigation”. The first option is preferable. The second option only comes into play if there is a good reason to not use the semantic HTML element.
You can adjust HTML markup in Elementor under Layout for relevant widgets such as Inner Section:
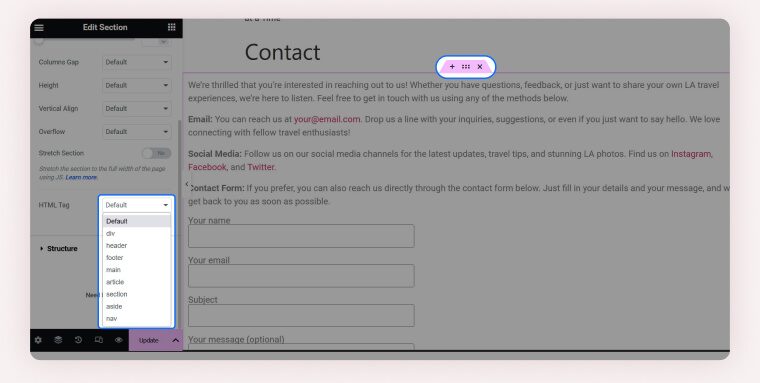
Simply use the drop-down menu to pick the correct HTML tag. The WordPress Menu widget should always automatically use <nav> and does not require any changes on your end.
Assigning ARIA roles in Elementor
To assign roles, you can add custom attributes under Advanced > Attributes for widgets that support this feature, including the WordPress Menu widget. Note that this option is only available in Elementor Pro. Use key|value pairs to add your custom attributes. For example, to add role=”navigation” to your navigation menu, you would input role|navigation into this field. More information is available in the Elementor documentation.

Ensure the tab order is logical
Another important factor for the accessibility of navigation menus is the tab order. This is the order in which elements are selected when you navigate a web page using the Tab key on a keyboard. It is crucial to help people who depend on keyboard navigation to get around your website properly.
One way you can ensure correct tab order is by using <button> and <a> elements to mark your navigation items. In most cases, Elementor should do this automatically via the WordPress Menu widget:
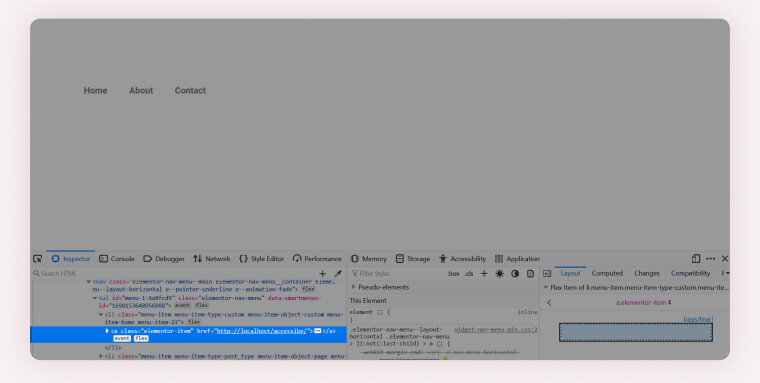
If you want to double-check, try it out yourself. Open your website and see what it’s like navigating it with just a keyboard. See if you get stuck somewhere and if all items are accessible. Pay extra attention to drop-down menus, which can be especially tricky.
Use a visible focus indicator
Another critical element that impacts the accessibility of navigation menus is the focus indicator. In case you are not familiar with it, “focus” is one of several states that links, including navigation items can take on.
For example, the “hover” state is when visitors move their mouse cursor over a link or button and the element changes its look in response. The “focus” state is important for accessibility as it indicates that an element is currently chosen by a keyboard.
Here’s what it looks like:
To ensure that website visitors who depend on keyboard navigation to navigate your website can properly leverage the indicator, it needs to be clearly visible with enough contrast with its background.
One of the most common ways to achieve this is to add a border around the element. This is visible in the example above, where one of the menu items has a blue frame around it. Another option is a background color change or a combination of the two.
Elementor has focus styles by default. If you want to make changes to them so that they better fit in with the rest of your website design, you can do so via CSS. There are several options for that.
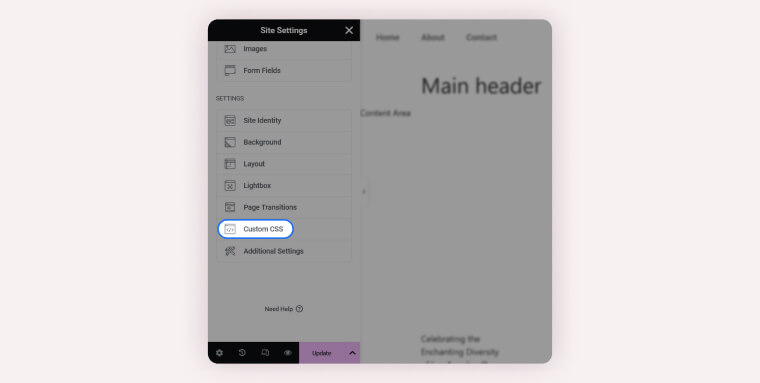
For site-wide modifications, go to Site Settings and then Custom CSS:
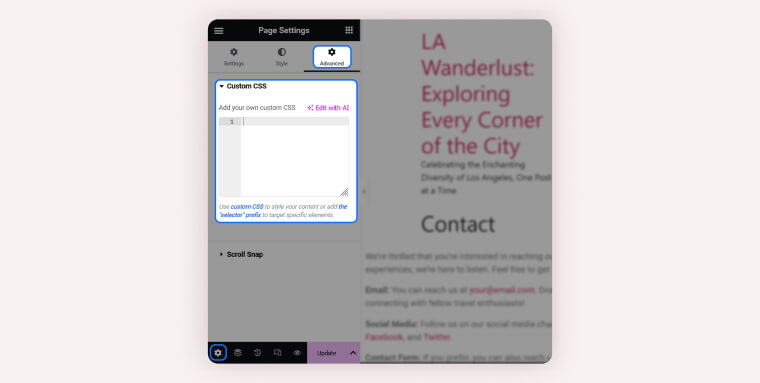
If you want to limit your custom code to a single page, open it in Elementor and then use the gear icon in the bottom left corner to open the page settings. You will find the option to add custom CSS under Advanced:
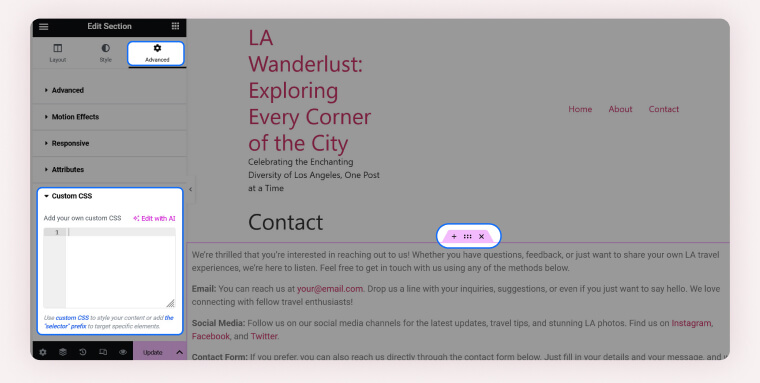
Finally, you can also change styles for individual elements under Advanced > Custom CSS for most of the widgets:
Important note: Use the contrast measurement tool mentioned above to make sure your color choices are sufficient.
Include adequate spacing
Another important angle you should cover to ensure your Elementor navigation menu is accessible is to provide enough spacing around menu items and other clickable elements on your website. That way, people with motor impairments can easily click them without accidentally activating adjacent links. For that purpose, use the options for padding and adjusting the space between menu items. Those are also available in the WordPress Menu widget under Style:
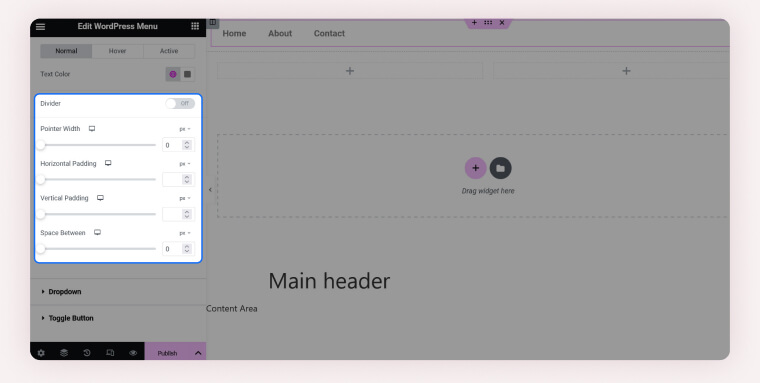
In the same place, you can also add a divider between the menu items and adjust the size of the marker that appears on hover or focus. In addition, there are similar options for drop-down menus and the toggle button for mobile menus.
True accessibility requires a third-party plugin
Even if you do your best to apply all of the above, there can still be gaps in the accessibility of your Elementor website. That’s why, if you truly want to take accessibility seriously, consider integrating a third-party accessibility plugin, like accessWidget.
accessWidget is available for Elementor and will identify and correct inaccessible code in your navigation menu. Leveraging AI, it runs an automatic audit of your Elementor website to identify code problems, then applies the necessary adjustments. This includes adding ARIA attributes to relevant HTML elements to ensure screen reader compatibility and keyboard navigation.
accessWidget also offers website visitors an interface through which they can change design elements within your website themselves so that they better fit their own abilities. For example, they can increase contrast and font size, stop animations from running, and enable read-only mode. accessWidget fully integrates with Elementor, ensuring that any websites built with the WordPress website builder plugin are fully accessible.
You can click here to install the accessWidget plugin on your Elementor website.
A deeper dive into WCAG
Despite its length and complexity, WCAG is built upon four fundamental principles:
- Perceivable: The content on your Elementor website should be accessible through sound, sight, and touch
- Operable: Your Elementor website must be operable by all, regardless of their abilities. This means it should be navigable using a keyboard, assistive technologies for sight-assisted navigation, or alternative input methods
- Understandable: The content of your Elementor website needs to be easy to comprehend. It should be devoid of technical jargon, complex terminology, and complicated instructions that might be challenging for people with certain cognitive impairments to follow
- Robust: An accessible Elementor website should adhere to HTML and CSS specifications and be compatible with the assistive technologies
WCAG versions and levels
Over the years, WCAG has seen several iterations:
- WCAG 2.0, introduced in 2008
- WCAG 2.1, an updated version of the guidelines, was released in 2018
- WCAG 2.2, which was officially published on October 5th, 2023
All WCAG versions offer three levels websites can conform to:
- Level A: The lowest level of conformance
- Level AA: The conformance level referenced in most accessibility regulations worldwide
- Level AAA: The most challenging level of conformance to attain, representing optimal accessibility
It is highly recommended your Elementor website conforms to WCAG 2.1 Level AA.
Achieving WCAG 2.1 Level AA conformance for your Elementor website calls for meeting numerous technical and design-based requirements. These include but are not limited to:
- Compatibility with assistive technology like screen readers
- Keyboard-only navigation
- Mobile-responsive design
- Proper color contrasts
- Captions for meaningful video content
What does Elementor offer in terms of accessibility?
If you are using Elementor to build and maintain your website, there are a few things that automatically work to your advantage in terms of accessibility:
- Built-in accessibility features: A conscious effort was made by Elementor itself to account for the needs of website visitors with certain disabilities. For example, Elementor Pro’s Form Widget automatically creates forms with sufficient color between text and its background, clear labels, relative fonts, and correct tab order to make them fully accessible
- Intuitive interface: With the way Elementor is set up, you can fairly easily make design decisions with accessibility in mind. As you will see below, it’s easy to adjust the design of your website to make it more usable for visitors with disabilities
- Commitment to continuous improvement: Elementor is committed to improving its accessibility status over time and is actively working on making the plugin and its markup more accessible
- Easy responsive design: All websites built with Elementor are automatically responsive and display well on different screen sizes and devices. This is a core tenet of web accessibility, since it also makes websites more usable on assistive technology used by some website visitors with disabilities
- Third-party accessibility plugins: With it being a WordPress website builder, Elementor allows users to integrate with powerful accessibility plugins, such as accessWidget. Given that achieving full accessibility, even when pursued earnestly, can require a lot of time and work, many Elementor website owners opt to rely on an accessibility plugin
How to test your Elementor website for accessibility
To test your Elementor website’s current level of accessibility, you can use automated testing tools like accessScan, and enlist the expertise of accessServices.
To use accessScan, you’ll simply need to submit your Elementor website URL. It will then conduct a quick, automated audit of your web page to determine if it conforms to WCAG 2.1 Level AA. Once the test is completed, you’ll receive a detailed report highlighting any non-accessible elements on your website.
You can also test your Elementor website for accessibility with the help of service providers, such as accessServices. Many Elementor website owners opt to have accessServices conduct a thorough examination of their online platforms and implement necessary adjustments to ensure full accessibility.
This combination of testing approaches is considered best practice. Elementor website owners commonly start with an automated tool for an initial accessibility test and then turn toward expert service providers to analyze and remediate any identified issues.
Why making your Elementor website accessible is critical

16% of the world’s population, including more than a quarter of adult Americans, live with some form of disability. However, online environments, by and large, are still partially or fully inaccessible to the various disability communities.
As website owners, it falls upon us to create an inclusive digital space where every visitor, including those with disabilities, can access and engage with our content.
It is worth recognizing that ensuring your website is fully accessible not only sees you fulfilling your ethical responsibilities, but also unlocks substantial business potential. When your Elementor website is accessible, you open the doors to a broader audience, including a demographic with a collective spending capacity exceeding $13 trillion.
Elementor website owners’ legal obligation to ensure website accessibility
Businesses operating within the United States, Canada, or the European Union may be legally mandated to ensure their websites are accessible.
In the United States, the Americans with Disabilities Act (ADA) is now applied to the digital realm by many courts. These cases reference the Web Content Accessibility Guidelines (WCAG) as the standard websites need to adhere to in matters of web accessibility. You can find further insights in our ADA website compliance checklist.
Additionally, under Section 508 of the Rehabilitation Act, governmental bodies, organizations receiving federal funding, and service providers to such organizations must ensure that their websites conform to WCAG 2.0 Level AA. Further details can be found in our Section 508 website compliance checklist.
For businesses registered in the province of Ontario, Canada, compliance with the Accessibility for Ontarians with Disabilities Act (AODA) is typically required. AODA mandates that your website, whether powered by Elementor or another platform, conforms to WCAG 2.0 Level AA. You can explore comprehensive information about AODA compliance requirements in our AODA website compliance checklist.
Closing thoughts
Using Elementor to build a WordPress website is a popular solution for non-developers. However, if you aren’t conscious of them while designing your Elementor website, people with disabilities won’t be able to fully access your site.
Thankfully, Elementor provides plenty of tools to make your website usable for all visitors, regardless of ability. It comes with built-in accessibility features and also has extensive functionality to modify website elements to make the visitor experience more inclusive.
Frequently asked questions about making your Elementor-built website accessible
Q1. What does it mean for a website built with Elementor to be accessible?
A1. It means your Elementor site supports visitors with disabilities and aligns with standards such as the WCAG 2.1 Level AA. Key components include alt text for meaningful images, captions and transcripts for video, keyboard-only navigation, visible focus states, sufficient colour contrast, and properly structured headings.
Q2. Why is accessibility important for Elementor websites?
A2. Because Elementor enables rich design freedom and interactive elements, the risk of introducing accessibility barriers increases. Sites built with Elementor still carry the obligations of laws like the Americans with Disabilities Act (ADA) and other global regulations, so making the site accessible protects your audience, brand reputation and legal standing.
Q3. What common accessibility mistakes are made in Elementor sites?
A3. Frequent issues include: missing alt text on decorative vs meaningful images, heading levels skipped or inconsistent, insufficient contrast between text and background, editable sections lacking keyboard operability, video without captions or audio descriptions, and downloadable documents that aren’t tagged for screen-reader use.
Q4. What steps should I take to improve accessibility in an Elementor website?
A4. Steps include: review image alt attributes and classify decorative vs meaningful; check videos for captions/transcripts; ensure headings progress logically (H1 → H2 → H3…); test keyboard-only navigation and visible focus indicators; confirm colour contrast meets minimum ratios (4.5:1 for normal text); and tag any downloadable PDFs or Office files for accessibility.
Q5. How does Elementor support accessibility features?
A5. Elementor offers built-in settings like relative font sizing using rem/em units, global typography controls, colour-and contrast tools in Site Settings, image alt-text fields, and attributes support (including ARIA labels) via the Advanced tab. These features help implement accessibility best-practices within the page builder environment.
Q6. If I use an accessibility-ready theme and build with Elementor, does that guarantee my site is compliant?
A6. No. An accessible theme and a well-designed page builder are only starting points. Compliance depends on how you use them—your content choices, heading structure, alt text, widget configuration, keyboard behavior, contrast settings, and the accessibility of any third-party plugins you add. Even a perfectly coded theme can become non-compliant the moment inaccessible content or custom elements are introduced. Continuous testing and remediation are still required.
Q7. How can accessiBe help with accessibility on Elementor websites?
A7. accessiBe offers an end-to-end accessibility ecosystem for Elementor sites. Their WordPress plugin integrates with Elementor sites, enabling automated scanning and remediation of many accessibility issues, while expert-led remediation services handle code-level or complex barriers. This combined approach makes your site more inclusive, aligned with WCAG 2.1 Level AA, and better able to meet ADA expectations.
Q8. What business benefits come from making an Elementor website accessible?
A8. Beyond legal compliance, accessibility improves overall usability, increases your potential audience (including users with disabilities), enhances SEO and discoverability, reduces bounce rates and abandoned interactions, and strengthens brand reputation. It turns accessibility from a cost into a business-enabler.