Perhaps more than any other content management system (CMS) on the market, Webflow allows you to fully flex your creative muscles even with limited, or non-existent, coding chops. The platform’s near-limitless design options allow you to create exceptional websites that, by and large, cannot be built with most other website builders.
However, this powerful creative freedom often results in websites that wow some visitors, while presenting others with significant digital barriers.
For the most part, Webflow websites aren’t accessible to people with certain disabilities.
Many Webflow websites lack fundamental accessibility elements, such as screen reader technology compatibility and the ability to navigate the website only via keyboard. And, even when created with an awareness toward the needs of the disability community, Webflow websites can still be partially inaccessible.
Luckily, you can transform your Webflow website into one that welcomes all visitors, including those with disabilities. And, with the right tools, you can even empower visitors to configure your site themselves so that it fits their unique abilities.
In this blog, we will show you everything you need to know about making your Webflow website accessible to people with disabilities. We will explain why it is important to ensure the disability community is given equal access to your website, and explore how expanding your potential customer base can lead to positive business outcomes.
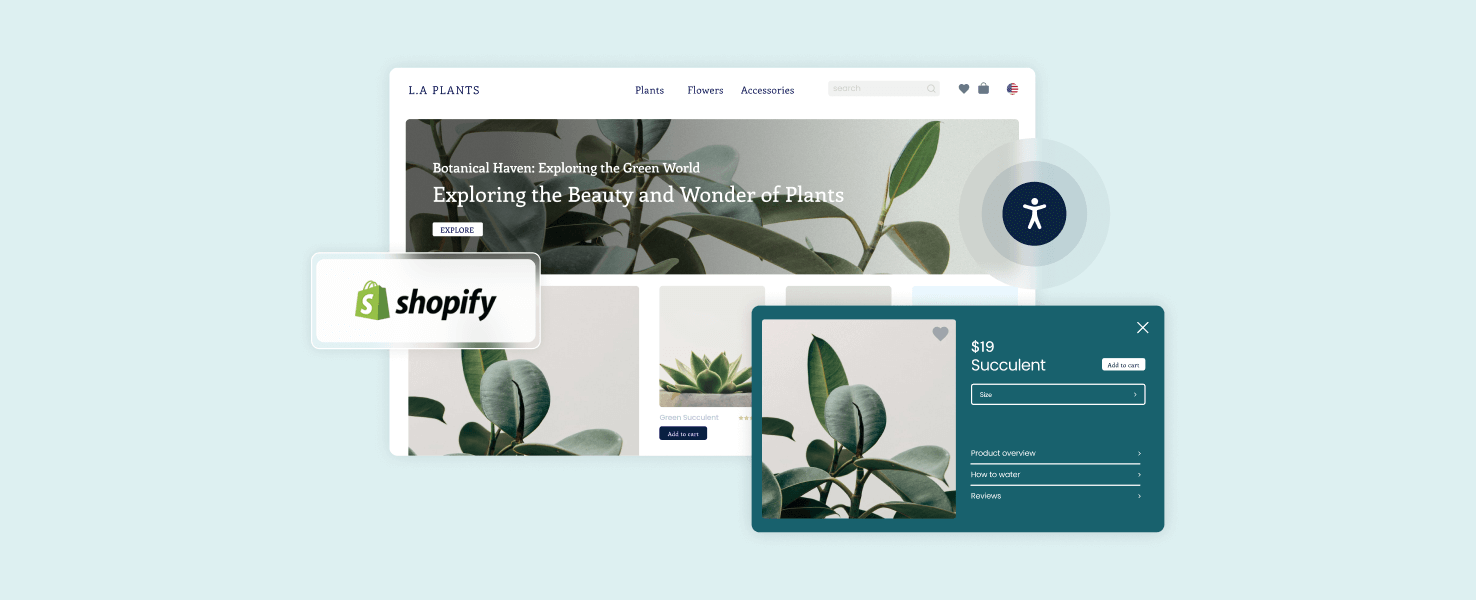
New in Webflow’s app marketplace: accessiBe’s accessibility app.
- For it to be accessible, your Webflow website needs to conform to the Web Content Accessibility Guidelines (WCAG) at Level AA
- This means that your Webflow website needs to meet a list of accessibility requirements. These include, but aren’t limited to, compatibility with assistive technology, allowance for keyboard-only navigation, sufficient contrast between text and its background colors, alt text for meaningful images, and captions for videos
- Webflow offers several built-in accessibility features, such as its color contrast checker. However, relying on these features alone will not ensure your website is accessible and in conformance with WCAG
- To achieve full accessibility, you will ultimately need to integrate your Webflow website with a web accessibility solution, such as accessWidget
What does having an accessible Webflow website mean?
For your website to be considered accessible, it will need to accommodate all visitors, regardless of ability. And for you to achieve this, you need to ensure your Webflow website adheres to prominent web accessibility standards. These standards include specific instructions and guidelines that, when followed, ensure that your Webflow website is configured and designed so that it provides an equal user experience to all website visitors.
The most important set of web accessibility guidelines are the Web Content Accessibility Guidelines (WCAG). Created by the World Wide Web Consortium (W3C), WCAG is generally accepted as the most important web accessibility standards in the world today. WCAG also heavily impacts global web accessibility policy, a topic we will elaborate on later in the blog.
Despite being a long and complex document, WCAG’s numerous sections (or success criteria) are ultimately based on four fundamental principles:
- Perceivable: Website visitors should be able to perceive content appearing on your Webflow website through their senses of sound, sight, and touch
- Operable: Website visitors need to be able to operate your Webflow site regardless of ability. An operable Webflow website needs to be navigable entirely by keyboard, sight-assisted navigation, and other alternatives to a classic mouse
- Understandable: Your Webflow site needs to be easy to understand. It should not include overly technical terms or complex jargon, and should be devoid of complicated instructions that are difficult to follow
- Robust: For your Webflow website to be robust, it needs to: Use HTML and CSS according to specification, and to be compatible with assistive tools that people with disabilities use to browse online
WCAG versions and levels
Throughout the years, there have been a number of WCAG iterations:
- WCAG 2.0 was released in 2008
- WCAG 2.1, an updated version of these guidelines and was released in 2018
- WCAG 2.2, which was officially published in October of 2023
All WCAG versions have three levels you can conform to:
- Level A – the lowest level of conformance
- Level AA – the conformance level referenced in most accessibility regulations around the world
- Level AAA – the optimal and most difficult level of conformance to achieve
It is highly recommended that your Webflow website conforms to WCAG 2.1 or 2.2 Level AA.

Conforming to WCAG 2.1 or 2.2 Level AA requires that your Webflow website meets a number of technical and design-based requirements. These include, but certainly aren’t limited to:
- Compatibility with screen reader technology
- Keyboard-only navigation
- Mobile-responsive design
- Proper color contrasts
- Captions for meaningful video content
We will explain these requirements in further detail later in the blog. To skip to that section now, you can press here.
What does Webflow offer in terms of accessibility?
Webflow has some handy tools built into the Designer that can help you build your website with accessibility in mind.
The Audit panel, located on the bottom left-hand side of the Designer, checks for performance and usability issues. These include specific accessibility concerns, such as non-descriptive link content, missing alt text, and whether headings have been applied correctly.
Additionally, Webflow has a color contrast checker built into the Style panel. You can examine the color contrasts between text and its background, and see their level of conformance to WCAG Level AA and Level AAA. Color contrasts that fail to meet WCAG Level AA requirements are marked as a fail.
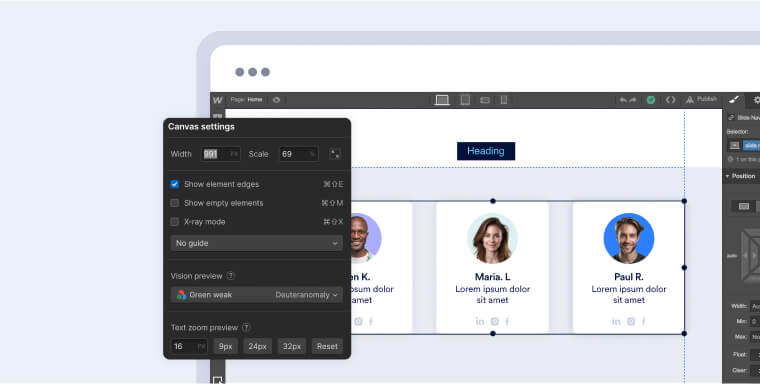
Two more accessibility tools can be accessed from the canvas settings:
- The Vision Preview: This tool simulates how people with different vision impairments would view your website. These impairments include green color blindness, blue-yellow color blindness, full spectrum color blindness, and blurred vision. To access the Vision Preview, click on the canvas settings icon at the top of the Designer. In the canvas settings modal, scroll down to the vision preview section
- The Text Zoom Preview, which simulates how website visitors use the browser zoom capabilities. This can show developers working in the Designer if the layout breaks, or whether there are text wrapping issues that make it difficult to consume content when text is increased by up to 200%. To access the Text Zoom Preview, click on the canvas settings icon at the top of the Designer. In the Canvas settings modal, scroll down to the Text Zoom Preview section
How to make your Webflow website accessible: a deep dive
Ensuring your Webflow website is accessible will require you to consider the unique needs of the disability community throughout the website’s planning, design, and development stages. While you can run an accessibility audit once you’ve completed designing your website, it is better to plan your website with accessibility in mind right from the get-go. This can save you time and money.
Since designing a Webflow website is typically a multi-tiered process, we’ve decided to tackle each tier, or phase, separately.
Therefore, accessibility best practices will be presented in two separate phases, according to when they are most relevant and applicable. These phases are:
You can click on each phase to skip straight to it.
The design and planning phase
Accessibility needs to be considered during the planning and design phase of your Webflow website. During this phase, some primary accessibility considerations include:
1. Use animation and motion economically
Webflow interactions are incredibly powerful and flexible. But with great power comes great responsibility. Certain motion can be harmful to some website visitors, such as motion behind static text, flashing, and parallax animations.
Ideally, motion should be avoided whenever possible. Yet, if in certain instances you feel that it is necessary, it is important you follow relevant WCAG guidelines.
Some animations may require a stop, pause, or hide button, depending on length. Additionally, you should completely avoid using flashing content.
You can read more about specific requirements by pressing here.
2. Use accessible fonts
WCAG has sections that apply specifically to text. These include ensuring fonts are easy to read when resized and when presented with different style or spacing. Using accessible fonts is essential for many people with disabilities, especially for individuals with certain vision impairments. Accessible fonts will allow for easy consumption of content, while thin and illegible fonts will present some people with significant digital barriers.
It is worth noting that accessible, highly-readable fonts benefit all website visitors, including those outside of the disability community. As a whole, website visitors generally do not read entire chunks of text, but, rather, glance and skim it for important information.
Accessible fonts also can help in search engine rankings, as websites with a high level of readability generally rank higher.
When incorporating accessible fonts into the Webflow build, it is important to ensure the font sizes are accessible on all devices. To that end, you will want to use CSS relative units. Webflow makes this easy by allowing you to select a relative unit, such as REM or Root Element’s font-size in the Style panel. Usually the default root font size is 16px. Therefore, for simple math 16px = 1 REM.
In Webflow, you can swap pixels for REM by typing simple math equations in the size input fields. For example: 120px, 120/16rem results in 7.5rem.
3. Select the right target size
It is best practice to ensure that elements such as buttons, icons, or other interactive elements take up at least 24×24 pixels of space. This can include white space around the target. This is important as it makes a website more accessible to those who find fine-motor control movements difficult, people with larger fingers, or people using a stylus or other devices for assistance.
4. Consider the components you will be using
The planning and design phase is a good time to take stock of any components that you are considering using, such as accordions, pop-up modals, carousels, or background videos, just to name a few. As these components can present a substantial number of accessibility issues, you should evaluate how you prepare to use them throughout your website. It is important to note that if you plan on using these types of components, you will need to put in more effort during the development process to ensure they are accessible.
The development phase
After setting yourself up for success during the design and planning phase, it’s time to get to work.
The most impactful and simple things to do to make your Webflow website accessible come from following HTML and CSS best practices for accessibility.
Paying specific attention to semantic HTML structure and CSS focus states is particularly important. Let’s break these issues down in further detail:
1. Set your language code
Your first step should be navigating to the settings section of your Webflow website. In the General tab, you will find the important language code setting. This sets the HTML lang attribute for the website and signals to screen readers to change to the correct language profile and pronunciations. It is also important to use the HTML lang tag if you are switching languages within a web page.
2. Set up page titles and description
In the Webflow Designer, each web page has its own metadata settings, which are necessary for Search Engine Optimization (SEO). These include title, meta description, and the open graph image. The most important setting for accessibility is the meta-title. It is usually the first piece of information announced by assistive technology, such as screen readers, when a web page loads. This lets users of such tools understand the essence and message of the web page they will be navigating.
3. Add HTML tags
HTML is the building block of any website. Despite being a visual development platform, Webflow provides you with all the necessary tools to build a very solid and accessible structure for your website.
In Webflow you do this by setting up your essential landmark elements. These include:
<NAV>
<MAIN>
<SECTION>
<FOOTER>
You can apply HTML tags to any div using the dropdown in the settings panel on the right hand side of the screen. Alternatively, you can use Webflow pre-styled elements, such as Navbar or Section which already have the element tag pre-applied to them. Creating these landmarks helps assistive technologies understand the base structure of your website.
4. Keep a simple layout
Keep a simple and straightforward layout. Consistency in page layout makes it easy for visitors to easily navigate your website and find what they are looking for. Webflow is a blank canvas that allows an infinite number of layout options, so it is important not to overcomplicate or overwhelm the user.
A note on advanced layout:
When an HTML element is added to a web page, a specific order is created. If you choose to change the visual order of such elements, assistive technologies will not recognize these changes. You must therefore ensure programmatically that users of assistive technology can access content in the same order as it is being presented visually.
To that end, there are two areas you should pay attention to:
- You need to ensure that elements that share the same purpose are named and operate the same way throughout your website. For example, the “settings” button should have the same name and functionality across the website. There shouldn’t be anywhere on the website where this button is named “configurations”
- You need to ensure that elements appearing to facilitate proper navigation appear in the same spot throughout the website. For example, if the link to the ‘Terms and Services’ page appears at the far right section of the footer, it should appear in that position throughout the entire website
5. Apply HTML headings
People who use screen readers or other website visitors with cognitive disabilities rely on headings to guide them through your website. Headings are like a table of contents. They chunk content into understandable pieces for a user.
Headings need to be clear and descriptive but also follow a logical order:
The H1 header is the primary title, used once to headline the page. H2 headers are for sections appearing within the page, each representing a significant topic or theme. H3 headers are used for subsections within these H2 sections, detailing specific aspects of each main topic. H4, H5, and H6 headers further break down these subsections, offering layers of detail and aiding in a clear, structured presentation of information.
It is important to note that simply increasing font size so that it fits that of a specific heading class is not enough to classify text as a heading. For screen readers to identify them as headings, heading tags need to be added to titles.
To enact headings in Webflow, you will need to select Heading in the Typography bubble:
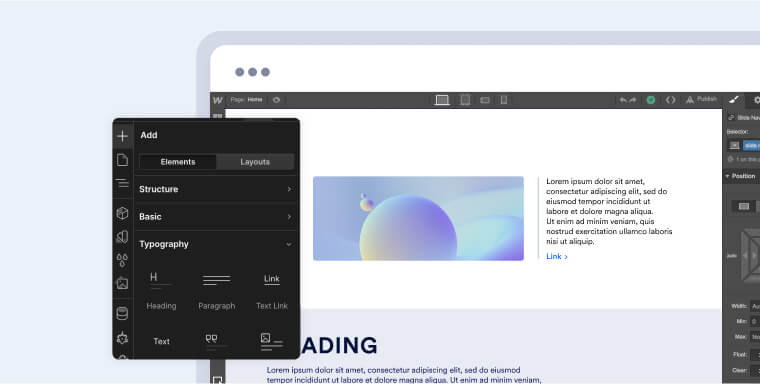
And then select the appropriate heading class:

6. Use semantic lists
The main building blocks of Webflow websites are div blocks. These can easily be used for nearly any design task. However, Webflow also provides a specific list element which should be used whenever there is a grouping or list. Using semantic lists informs screen readers that the content they are engaging with is a list of items. It also lets screen reader users know if there is a sequential order to the list and how many items are in it.
Important note: Webflow collection list elements are automatically styled as unordered lists.
7. Add focus states and visual cues
Some website visitors rely solely on their keyboard to navigate a website. They do so by tabbing through all of the actionable items. Web browsers generally add a default outline around links and other actionable items when keyboard users tab them. This helps keyboard users understand what item they are engaging with. Some Webflow elements, such as dropdown menus, however, are not recognized as actionable items, and without a focus state applied they will not be picked up by browsers.
In Webflow, you can ensure that all elements that can be tabbed are given a Keyboard Focus state. You can add this state in the Style panel in the style selector dropdown. It is important to add visual cues to all actionable items for all website visitors, and not just for those who use a keyboard for navigation. Importantly, these visual cues should not be solely based on color. Cues only based on color leave out website visitors with varying forms or color blindness and can be easily missed by others, as well. In general, color alone is a poor indicator or descriptor for when prompting a website visitor to take action. Think of other ways to show a visitor an item is actionable.
You can style several states besides Focus in Webflow. These include:
- None: The default state
- Hover: When an element is hovered over. Note that this does generally not work on most touch devices
- Pressed: The state when an element is clicked
- Visited: Indicates that a link has been previously visited
A note on logical tab order:
Tab order should be logical on a web page to ensure keyboard users can sequentially navigate items. An easy way to check if your website can be properly navigated solely via keyboard is to open a web browser and hit the tab key. Every actionable item should have a recognizable Focus State and be in sequential tab order as you move down the page.
8. Add alt text to meaningful images
Images are often used to convey meaning and deliver content within a website. However, certain visitors, specifically those who use screen readers, cannot access them if they do not feature descriptive alt text.
Alt text (alternative text) is an HTML attribute that contains the text description of an online image, visible when a user cannot access it. Alt text is read aloud by screen readers to people with vision impairments, and is generally invisible to other people visiting a webpage. However, if an image fails to load because of a slow internet connection, or browser settings have images turned off, alt text may appear on the page.
There are a variety of ways to add alt-text in Webflow.
It can be applied to every image uploaded in the Asset panel. Alternatively, alt text can be added or updated in the Style panel for a specific image. When it comes to images in Webflow’s CMS collections – a grouping of content types with a customizable structure like blog posts – you need to ensure that each image has a corresponding alt text field that it can be mapped to. The Multi-Image field also has a place to add alt text for each image.
As important as it is to use alt text, it is equally important to identify images that don’t convey any further meaning and set them to decorative.
You can do this in one of two easy ways:
- Navigate to Assets within the Designer, hover over the image, click settings, and, finally, check ‘Decorative’
- If you’ve added the image as Rich Text: Click on the image and then on the wrench icon. Finally, select “None: image is decorative” in Alt Text
9. Add descriptive text links
Links on a website should indicate very clearly where website visitors will be directed to if they click on them. This is especially important for screen reader users who cannot always gauge a link’s relevance solely based on context. “Read more,” “Click here” and “Learn more” are therefore poor link descriptors, or anchor text.
This is one area in which you can use ARIA labels in the custom attributes settings for an element. ARIA is a set of HTML roles and attributes that enhance the accessibility of web content and web-based applications for people with disabilities. By incorporating ARIA attributes and roles into their code, Webflow website creators can improve the accessibility of complex user interface components, dynamic content, and interactivity. In the case of text links, an ARIA label will provide the user with a recognizable, accessible name for this interactive element, and override the original button information that a screen reader would read out.
Here’s an example that helps illustrate this issue:
Let’s say you have a web page with a link leading visitors to read more about fishing on the Fraser River. Even if the button with the link has “Click for more info”, a sighted website visitor might recognize the content above the button and understand the link takes them to a page with more information about fishing on the Fraser River. However, a screen reader user is not provided with that context, and will likely not fully understand the purpose and destination of this link.
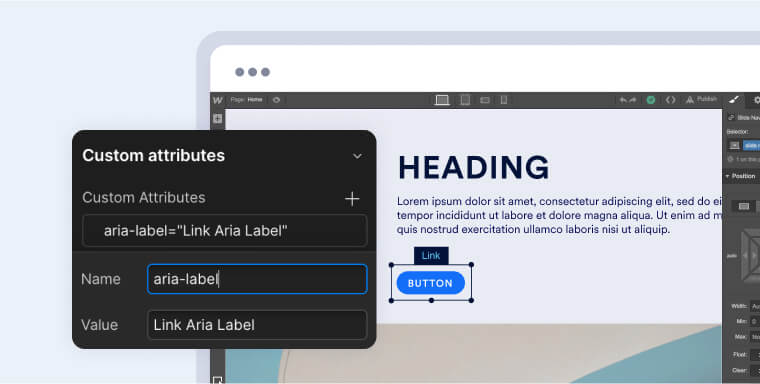
Adding an aria-label name: “aria-label” with the value: “Read more info about fishing on the Fraser River” to the link, specifies the information for the screen reader. Once it reads it aloud, the screen reader user will understand exactly where the link will take them.
Here’s how adding aria-labels looks like in the custom attributes field:
Adding ARIA labels is even more important with dynamic collection lists. In this case, each button or link is identical and the screen reader reading them out in sequence would give no context to the user. Until recently, the only way to add ARIA labels to collection lists in Webflow was via custom code. However, Webflow recently added dynamic mapping to custom attributes. Now, you can easily add a unique descriptive aria-label for each link in a list. Simply add an aria-label field in your collection and map it to the value of the ARIA label in custom attributes.
10. Add captions and transcripts to videos
The meaningful video content appearing on your Webflow website needs to feature accurate and complete captions. Captions are the on-screen text descriptions representing the meaningful dialogue and/or sounds appearing in a video. Critical for people with hearing impairments, captions allow them to properly comprehend the content displayed in the video.
Webflow allows you to feature videos using a variety of players and embeds, such as YouTube and Vimeo.
It is important to note that, while YouTube generates automatic closed captions, they are not always fully accurate. Under WCAG, automatically generated captions need to be verified to be considered accessible.
Video platforms like Vimeo allow you to upload a file containing your captions. You can read more about that by pressing here. You can also use Vimeo’s auto-generated captions feature. However, like with YouTube, you will need to review the captions and verify their accuracy.
Transcripts are another great way to add accessibility for videos. Transcripts are the textual representation of everything in a video. Depending on the video, this can include information about actions, costumes, settings, and scene changes, if relevant. Transcripts also provide an alternative way to consume video content, which is useful for people outside of the disability community, as well.
For transcripts, consider using a transcription service or software. Regardless of how you create them, transcripts should generally be placed beside or underneath the video player. You can also have transcripts appear on a separate web page, and direct people to them using a clearly labeled link.
Making videos accessible is a topic of its own, which you can read about in our guide for video accessibility.
11. Make sure your online documents are accessible
Online documents, such as PDFs, are frequently used on Webflow websites to provide information to visitors. It is common practice for a restaurant to provide downloadable PDFs of its menus, and for SaaS websites to offer downloadable eBooks, as well.
It is important that these documents are accessible to everyone, including those who are using assistive technologies like screen readers.
For an online document to be considered accessible, it needs to feature a number of elements, including, but not limited to:
- Proper tags
- Legible and large text
- Proper color contrast between text and its background
- Alt text for meaningful images, if those are featured
- Descriptive link text
If your online documents aren’t fully accessible, you will need to remediate them. As the process of remediating online documents can prove challenging, time-consuming, and costly, many Webflow website owners turn to expert service providers, such as accessServices, to perform these tasks for them. Relying on expert service providers can prove especially beneficial when dealing with lengthy, complex documents. With an intimate familiarity with relevant web and PDF accessibility guidelines, these experts are better equipped to handle these projects in a timely and cost-effective manner.
What should you do about custom code?
To meet basic accessibility requirements, a “Skip to Content” link is needed. This link allows keyboard users to bypass the Navigation menu and go straight to the main page content which has been identified by the HTML tag MAIN we addressed in website structure. You can skip back to that section by pressing here.
A small custom javascript code snippet is required to implement a “Skip to Content” link in Webflow.
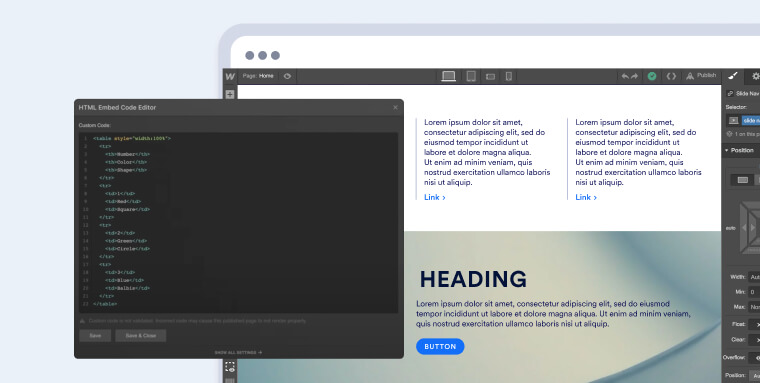
For more complex designs that use different website components, such as accordions, carousels, tables, and background videos, additional custom ARIA attributes or javascript will be needed to make a website accessible.
Finsweet Attributes, a popular Javascript library for Webflow has a whole selection dedicated to accessible attribute solutions. Additionally, the Webflow accessibility checklist has pure Javascript solutions like the “Skip to Content” link.
Ultimately, however, to ensure your Webflow website is truly accessible, you should think about using an accessibility app, like accessiBe.
Once installed on your Webflow website, accessWidget, accessiBe’s AI-powered solution, audits your website’s code, searching for problematic areas, such as code-based barriers preventing screen readers from properly identifying and announcing certain components to users. Once these are identified, accessWidget will automatically remediate the code, ensuring your website is accessible.
Good web accessibility tools also empower people with disabilities to configure your Webflow website so that it fits their unique abilities. accessWidget, for example, provides visitors with an interface through which they can adjust and even disable a variety of design elements. These include stopping animations, adjusting color contrasts, and enabling a text-only mode.
Learn more about how accessWidget can help make your Webflow website accessible.
Why making your Webflow website is critically important

16% of the world’s population has some form of disability. This group is often discriminated against, and it is on all of us to ensure its members are presented with a fair and equitable online experience.
It is interesting to note that the disability community has trillions of dollars in disposable income. When your Webflow website is accessible, you welcome people with a variety of disabilities to explore your products and services, and allow them to spend their hard-earned money on your offerings.
Web accessibility legal obligations
If you operate in the U.S., Canada, or the European Union, you may be mandated by law to ensure your Webflow website is accessible to people with disabilities.
While nothing yet has been codified into law, it is generally accepted that the Americans with Disabilities Act (ADA) applies to the online domain, as well as to businesses’ physical structures. U.S. courts today apply this law to websites, and often reference WCAG as the standard that should be met under the ADA.
Another prominent American law that includes clauses regarding web accessibility is Section 508 of the Rehabilitation Act. Applying to governmental bodies, federally-funded organizations, and service providers to such organizations, Section 508 points to WCAG 2.0 Level AA as its standard for compliance. Relevant bodies must ensure their websites and other information and communication technology (ICT), such as videos, PDFs, and email, to name a few, conform to WCAG at that level.
Ontario-registered businesses need to comply with the Accessibility for Ontarians with Disabilities Act (AODA). Under this law, your Webflow website must conform to WCAG 2.0 Level AA.
To learn more about complying with these laws, we recommend you check out these resources:
- ADA website compliance checklist
- Section 508 website compliance checklist
- AODA website compliance checklist
How to test your Webflow website’s accessibility level
To test whether your Webflow website is accessible, you can use automated testing tools, such as accessScan, and rely on expert service providers, like accessServices.
To use accessScan, you will need to submit your Webflow website’s URL, after which the tool will run a quick, automated audit of your web page and check whether it conforms to WCAG 2.1 Level AA. After the audit is complete, you will be presented with detailed results that will help you address website elements that are non-accessible (if any exist).
accessServices can be relied on to manually audit and remediate your Webflow website, as well. In general, Webflow websites are more complex in nature and require a more in-depth audit to determine if they accommodate all visitors. Many Webflow website owners often rely on accessServices to thoroughly inspect their online stores and make the necessary adjustments to ensure they are fully accessible.
It’s important to note that both approaches complement each other. Many Webflow website owners rely on automated tools for an initial audit of their online store, and then turn to expert service providers to help examine and remediate accessibility issues.
Frequently asked questions about making your Webflow website accessible
Q1. What are the key accessibility requirements for a Webflow website?
A1. The website should conform to the WCAG 2.1 or 2.2 Level AA standard, ensuring compatibility with screen readers, keyboard-only navigation, sufficient color contrast, alternative text for meaningful images, captions for videos, and a logical heading structure.
Q2. How can Webflow’s built-in features support accessibility?
A2. Webflow offers features like a color contrast checker in the Style panel, Vision Preview to simulate vision impairments, and Text Zoom Preview to test content readability when resized up to 200%.
Q3. What phases should a Webflow site follow to achieve accessibility?
A3. Accessibility should be integrated into two primary phases: (1) the design and planning phase—where fonts, contrast, motion, and structure are defined, and (2) the development phase—where keyboard navigation, ARIA roles, reading order, and assistive-technology compatibility are implemented.
Q4. What accessibility solution does accessiBe provide for Webflow users?
A4. accessiB’s official Webflow App allows users to install its accessWidget solution quickly. The app provides automated scanning and remediation of accessibility issues, helps meet WCAG 2.2 Level AA standards, and includes litigation-support options when needed.
Q5. Why should Webflow websites invest in accessibility beyond the built-in features?
A5. While Webflow’s built-in tools provide valuable support, full accessibility often requires deeper remediation—covering interactive components, documentation, consistent user flows, and ongoing maintenance—to ensure an inclusive experience for all users.
Closing thoughts
With unrivaled design options, Webflow can be leveraged to build truly unique websites, both from a design and usability perspective. However, this creative freedom sees Webflow users designing websites that cannot be fully accessed by people with certain disabilities. To ensure all visitors are treated equally, Webflow website owners should implement web accessibility best practices. And, by integrating with tools such as accessiBe’s app, Webflow website owners allow individual visitors to configure a website so that it fits their own unique abilities.