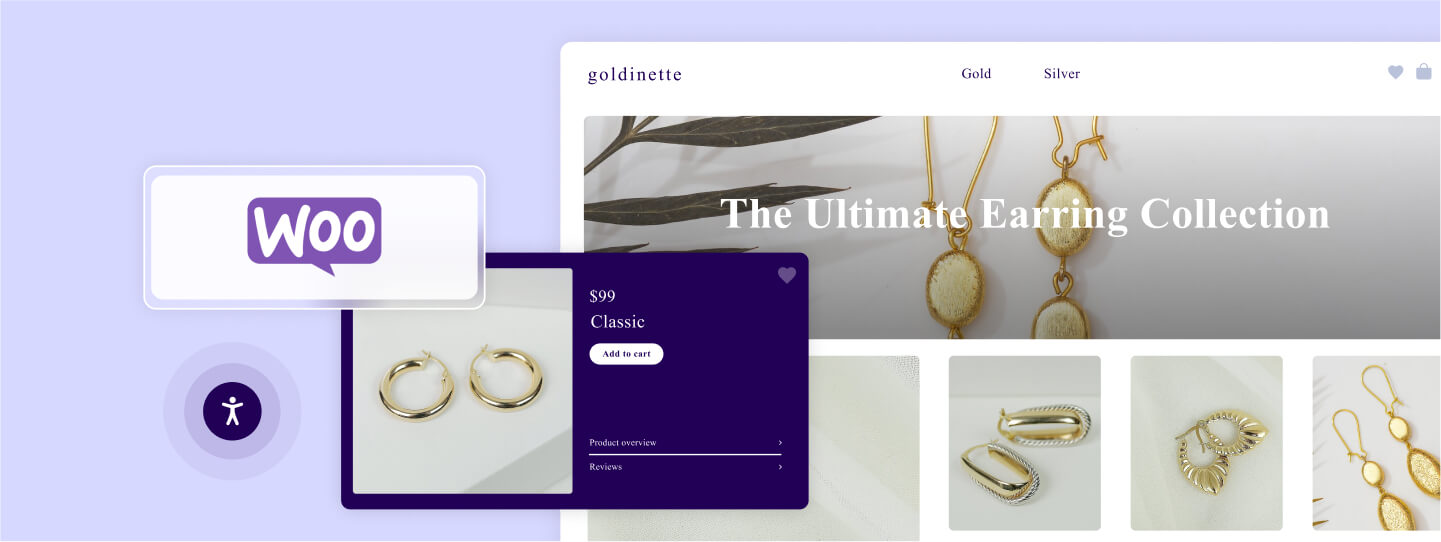
WooCommerce is one of the most popular e-commerce solutions in existence. In fact, almost 39% of all online shops have WooCommerce running in the background of their site. That’s literally millions of websites.
Consequently, WooCommerce is also one of the main systems that people with disabilities interact with when shopping online. As an owner, designer, or developer of WooCommerce websites, it is thus imperative that you know how to make it accessible.
To help you with that, in this blog post, we will not only explain why web accessibility is important and how it can lead to better business results, but we will also give you step-by-step instructions on how you can implement accessibility guidelines on your WooCommerce website.
How to make your WooCommerce website accessible
- Make sure your theme is accessible
- Use the right plugins
- Show page titles and taglines
- Use proper ARIA attributes
- Include sufficient headings
- Use clear language and formatting
- Include alt text for all meaningful images
- Make sure your fonts are legible
- Provide sufficient color contrast
- Use descriptive anchor text
- Make sure your forms are accessible
- Make sure your online documents are accessible
- Provide captions and transcripts for meaningful video content
- Use a web accessibility plugin
What does having an accessible WooCommerce website mean?
Building an accessible WooCommerce website means that all visitors and potential customers, including those with disabilities, can navigate and interact with the site effectively. To that end, your WooCommerce website will need to follow web accessibility standards. These standards offer specific guidelines that, when adhered to, ensure that your online store is configured and designed to provide an equal browsing and shopping experience, regardless of ability.

The web accessibility guidelines your WooCommerce website should conform to are the Web Content Accessibility Guidelines (WCAG). Created and continuously developed by the World Wide Web Consortium (W3C), WCAG is composed of various success criteria that your WooCommerce website needs to meet.
To be considerded accessible, your WooCommerce website will need to adhere to WCAG, and we’ll dive deeper into what that entails later in the blog. You can press here to skip straight to that section.
How to make your WooCommerce website accessible
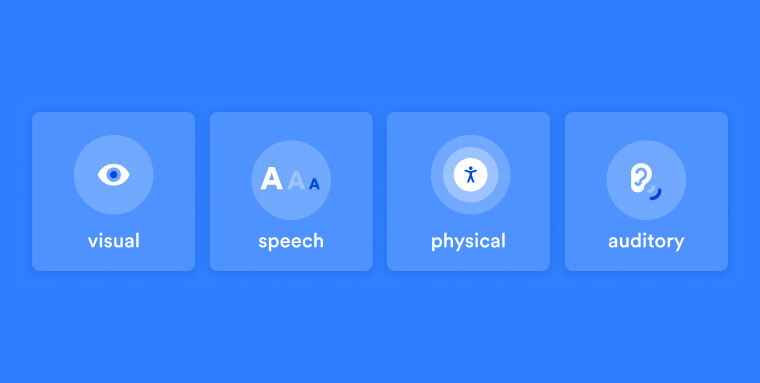
Making sure your WooCommerce website is accessible involves several steps and working with different parts of your website. One of the main reasons for this is that you have to account for different types of impairments your website visitors might have. There are people with hearing impairments or different visual disabilities like blindness, partial blindness, or color blindness. Others may have limited mobility and motor impairments, neurological conditions, speech impairments, experience seizures, and more.
Each of these conditions presents particular challenges for the accessibility of your WooCommerce website and needs to be addressed separately. Here’s how to do that:
1. Make sure your theme is accessible
In WordPress, a “theme” is the part that decides the look of a website. It contains information for colors, fonts, layouts, and all other website design elements, including your product pages and other parts of your shop. When you change your theme, you also change the entire look of your online shop.
For example, the image we present next shows the default design of the Storefront theme, which we will talk about more later in the blog. If you were to use another theme, your online shop would look completely different.
For that reason, one of the first things you need to look out for is that the theme you pick is compatible with WooCommerce. If it’s not, it might not contain styling for important parts of your online shop, such as the checkout page.
At the same time, make sure your theme is labeled “accessibility-ready.” This label means that the theme has been tested for adhering to accessibility standards.
Important note: This label doesn’t mean that the theme is fully accessible. You will still need to test it yourself to ensure it meets WCAG 2.1 Level AA criteria.
What makes a theme accessible?
Sufficient contrast
Having enough contrast between the text on your WooCommerce website and its background color is critical for accessibility. It allows people with certain vision impairments to read it more easily. This is especially important for meaningful content like product descriptions, shipping information, or your navigation menu.
What is sufficient contrast?
The minimum requirement under WCAG is 4.5:1 for normal text and 3:1 for large text (above 18pt). You can use a tool like Adobe Color Contrast Analyzer to test if your colors of choice meet this threshold.
Note that these contrast requirements do not only extend to body text. Contrast requirements also extend to non-text content, such as form field borders and backgrounds, link and button borders and backgrounds, and the focus indicator. We have an entire article on selecting accessible color schemes for more information on this topic.
Mobile responsiveness:
When your online shop is responsive, it means it automatically adapts to different screen sizes. Your pages properly display no matter what device or orientation they appear on. Responsive design is also critical for accessibility. Your site should be flexible enough to allow for people with vision impairments to scale their content using their browser zoom feature to make text easier to read. Additionally, when zoomed in or out, the appearance and functionality of the content should not be affected
Keyboard navigation compatibility:
While creating an online shop with WooCommerce, it’s important to test whether your theme allows keyboard-only navigation.
The simplest way to do that is to open your website in a browser and try to navigate it yourself using the TAB key. If you have trouble using your shop, so will your visitors who depend on keyboard navigation.
Try to search for individual products, add them to your shopping cart, and complete the purchase. Pay special attention to any standout features your theme offers, e.g. the way it displays product pages, or design elements it adds, like sliders or carousels. These can especially pose accessibility problems. Custom drop-down menus can be a hindrance too, so be sure to test those as well.
Be aware: Just because a WooCommerce theme claims it is accessible, that doesn’t automatically mean it is. It’s best to do your due diligence and test rather than blindly trust its marketing.
The free Storefront theme is both made for WooCommerce and accessibility-ready. Here is what it looks like in the WordPress theme directory:
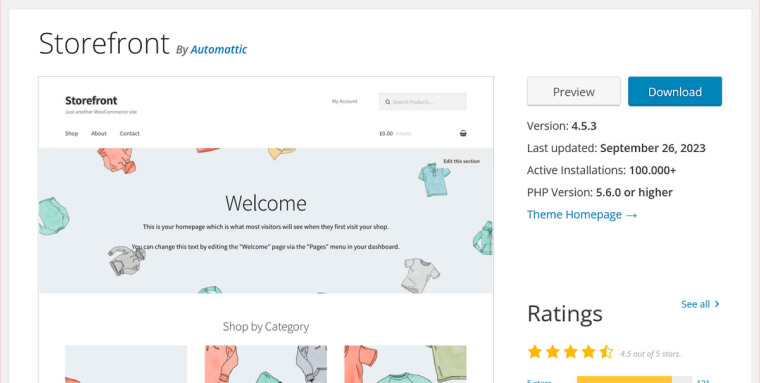
If you want more theme options, both the WordPress theme directory and marketplaces like ThemeForest offer filters to find what you are looking for. You can also check out our blog on selecting an accessible WooCommerce theme for further information.
2. Use the right plugins
Besides WooCommerce, the WordPress ecosystem offers many more plugins to add features and functionality to websites. For almost anything you can think of, there is already a plugin solution. WooCommerce itself offers a lot of extensions for its own plugin in the WooCommerce marketplace, and you can find more in the WordPress plugin directory, as well.
However, just like for themes, if you want to use plugins on your WooCommerce website, you need to check their accessibility status. This especially applies to extensions that add visual elements to your website. In online shops, this can be UI components like menus for selecting product variations, advanced search options, or product filters.
You have to test those just like you do for themes. Make sure they are usable with just keyboard navigation. You can also check out support and review forums, as users will often report accessibility issues there.
If you are a developer, one way to ensure better accessibility is to focus on WooCommerce extensions and plugins that work with core plugin functionality. As mentioned, WooCommerce’s core plugin’s accessibility is quite good, so anything that builds directly on existing components also benefits from the work that has already been done.
Besides keyboard navigation, you also have to pay attention to:
- Giving visitors the ability to control time limitations.
- Avoid adding any elements to your site that flash more than three times per second.
For example, if visitors automatically get logged out of a web page after a few seconds or minutes, ensure they can extend this period, and won’t lose session data by doing so.
Because there are such diverse requirements for making a website accessible, you really have to make an effort to ensure any WordPress plugins you use conform fully to WCAG guidelines.
3. Show page titles and taglines
Page titles and taglines help visitors identify the topic and content of your web and product pages. They also make it easier to find your pages in search results, sitemaps, and when there are multiple pages open in their browsers, making them an important accessibility tool.
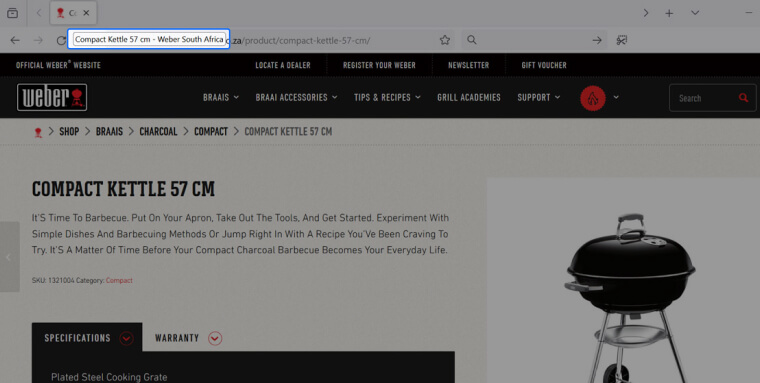
How to check your page titles:
The easiest way to find the page titles in your WooCommerce site is to open a web page in a browser and hover over its tab to see the title and tagline:
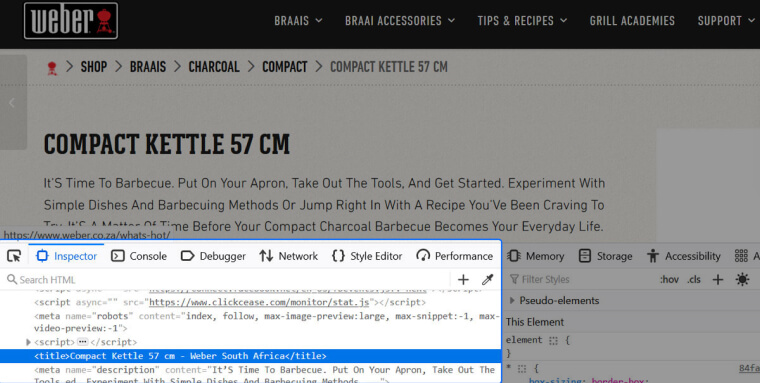
You can also use the browser developer tools and look for the <title> and <meta name=”description”> tags. Here you can see them visible in the Firefox page inspector tool:
How to include page titles and taglines in WooCommerce
There are several ways for you to add this information in WordPress/WooCommerce. For your homepage and website in general, you can find titles and taglines at the top under Settings > General in the WordPress back end:
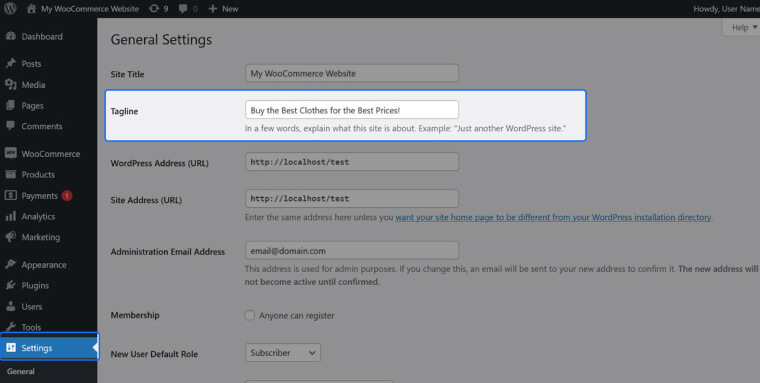
Check whether the information for Site Title and Tagline is correct. Make any changes you need and save them at the bottom.
Depending on the theme you are using, you might also have access to the WordPress Customizer via Appearance > Customize. Here, you find the same options under Site Identity:
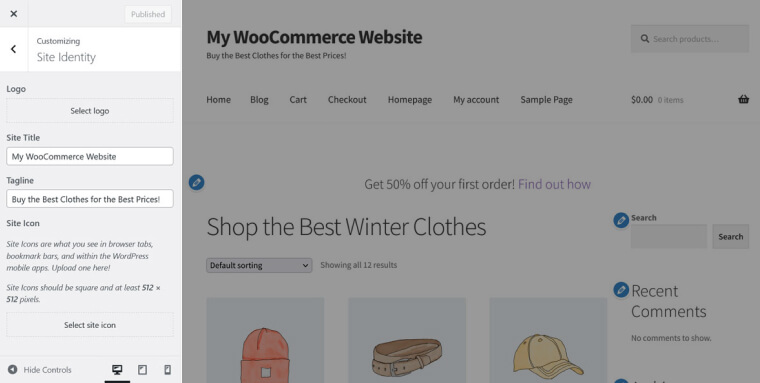
Modify them at will and use the Publish button to make the changes permanent.
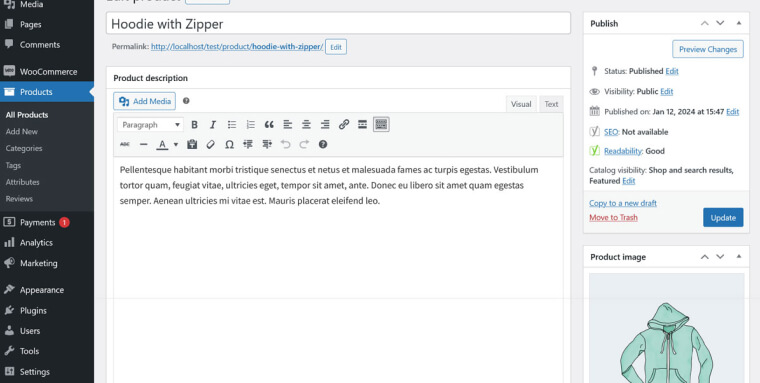
For all other posts and pages, you can set the page title at the top of the WordPress editor, including when you create products in WooCommerce. In your WooCommerce website, go to Products > Add New or choose an existing product under All Products. You find the option to enter a title right at in the first text field:
4. Use proper ARIA attributes
ARIA attributes are HTML code that provide extra context for the function of different page and layout elements. This information gets picked up by screen readers to help people with vision impairments navigate websites.
If you followed our advice to select an accessible WooCommerce theme, it should already use proper semantic HTML and ARIA attributes.
However, even themes labeled as accessible can be lacking in this area. And, unfortunately, there is no easy manual way to assign ARIA attributes inside WordPress and WooCommerce without development skills. An accessibility plugin like accessWidget, that automatically detects missing ARIA and then applies the necessary markup to inaccessible elements, can be really helpful here.
5. Include sufficient headings
The purpose of headings is to provide order and structure to digital content. They provide both website visitors and search engines with an overview of what a web page is about by breaking it down into topical sections.
There should always only be one h1 heading on the page containing the most important information about the page, such as the product title with a clear description. The rest of the content should be nested appropriately below. Ideally, your WordPress theme of choice automatically takes care of that. If it doesn’t, it’s time to pick another one.
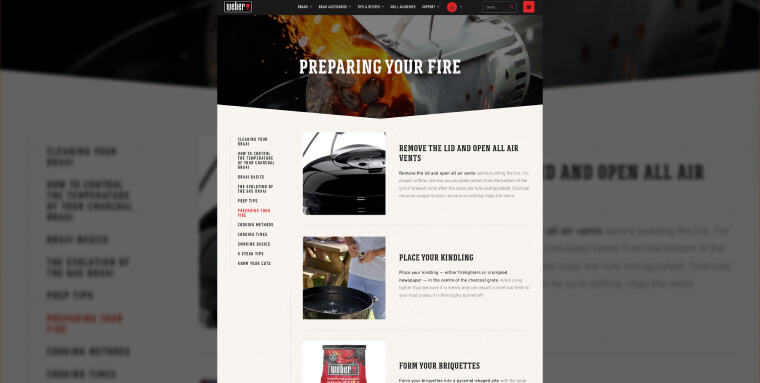
For example, here is a list of tips on how to use a product sold on the same website. The title, “Preparing Your Fire” is a h1 heading, while the titles of the steps one can take to prepare the fire for their Weber grill described in the following screenshot all appear as h2s.
Headings are also critical for accessibility, especially for screen-reader users.
Screen readers rely on headings as anchor points to allow visitors to skip to sections they are interested in. Screen readers also announce the level of a heading tag (h1, h2, h3, etc.) to help assess the importance of the content.
For that reason, it’s crucial that you use real heading tags instead of simply bolding text and/or increasing its font size. Screen readers use the actual HTML markup, not the visual appearance of text elements, to determine page structure.
Using heading tags in WooCommerce
The default way to apply headings in WordPress is to use the Heading block. This applies both in the Site Editor, which you can use to adjust your page templates, as well as the Content Editor used for blog posts.
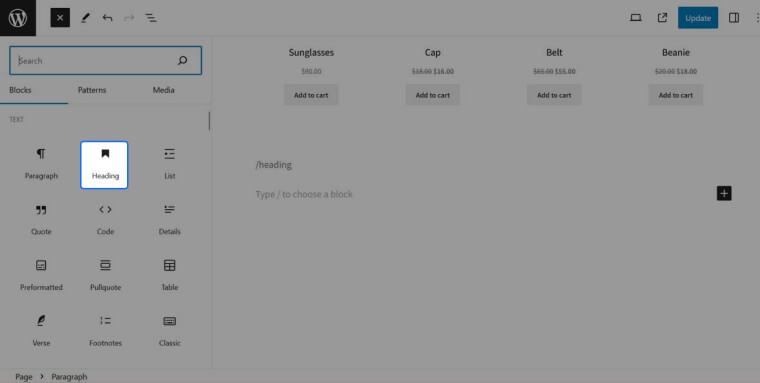
Use a slash forward (“/”) and type the name of the heading block or use the buttons for inputting blocks inside the editor as seen in the following screenshot:
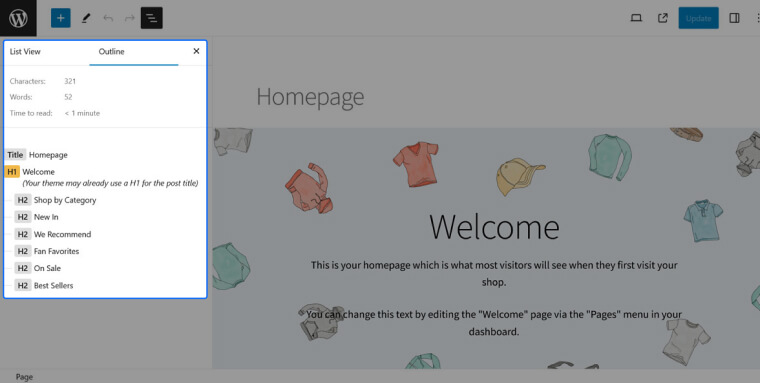
The entire heading structure of your pages shows up in the Outline menu inside the list view in the upper left corner of the WordPress editor.
Be aware, however, that WooCommerce uses a different editor for customizing product information. Here, you can use the style selection control in the text editor toolbar, which is set to Paragraph by default, to turn text into headings.
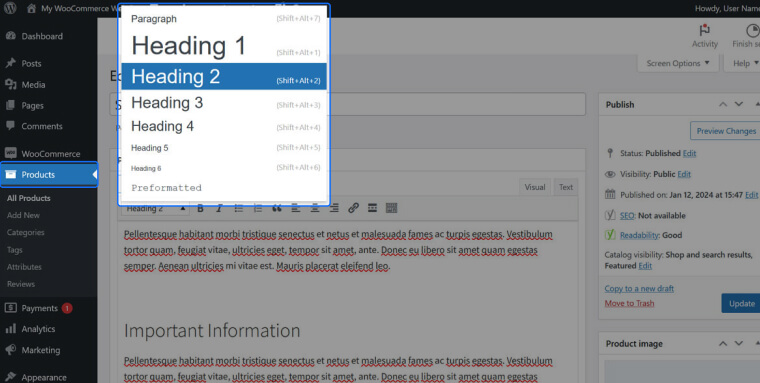
Alternatively, use Cmd/Ctrl and the numbers 1 to 6 to create headings from level 1 to level 6.
6. Use clear language and formatting
The way in which you describe goods and services plays a critical role in the readability of your content. If it’s full of jargon and convoluted or technical words, it will be harder to comprehend. This applies to all of your visitors, however, it especially impacts people with certain disabilities, such as cognitive disabilities.
This is especially important for calls to action. Here, try not to get too innovative with what you write on buttons (e.g. “I’m on board!”). Just like link anchor text (“Read More”), be sure to make it clear to anyone what happens when they click on it (for example, say “’Read More about Compact Grills”, instead).
It is also important to use proper HTML formatting in your content. That means, for example, using bulleted and numbered lists. Avoid creating them by hand, such as with spaces or tabs. Doing so will confuse screen readers, making your content harder to consume.
Fortunately, WordPress and WooCommerce make it really easy to create lists in your product descriptions and pages. If you put a hyphen or a “1.” at the beginning of an empty line and hit the spacebar, the WordPress block editor will automatically create an appropriate list.
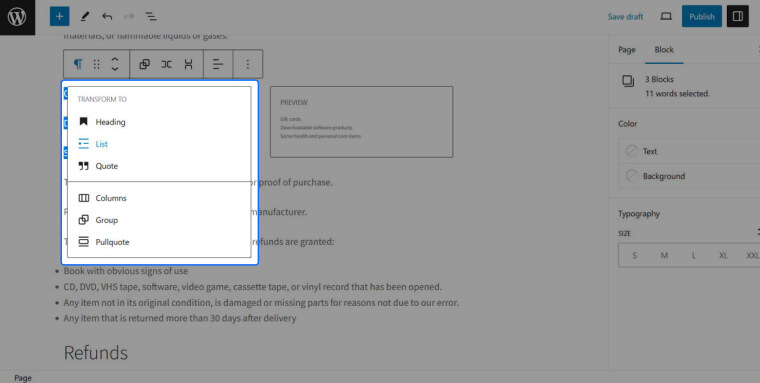
Alternatively, you can also manually create list blocks via the methods mentioned in previous sections. In the following screenshot, you can see how it is possible to transform several paragraphs into a list block in the WordPress editor.
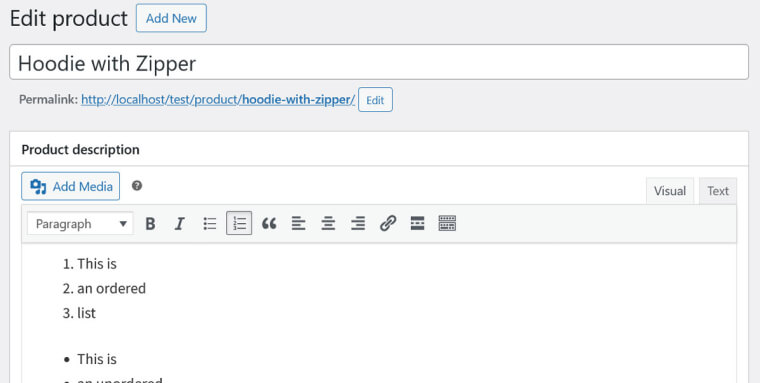
In the WooCommerce product editor, you need to use the buttons in the toolbar on top or press Alt+Shift+O and Alt+Shift+U to create ordered and unordered lists, respectively. In the following image, you can see where the buttons are located and what lists look like in the editor.
Other elements that should include proper HTML varieties are columns and tables.
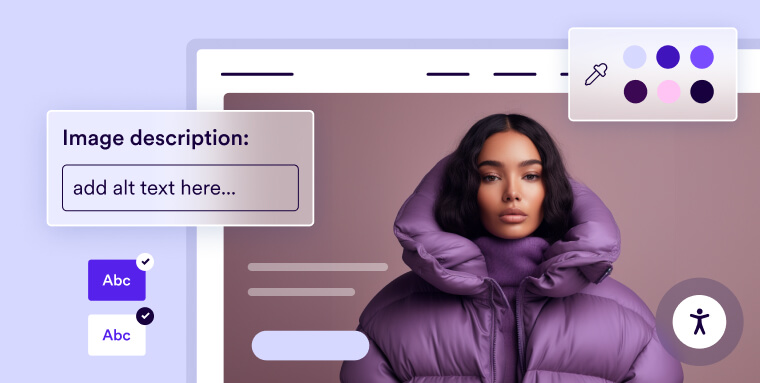
7. Include alt text for all meaningful images
Alt text is a text-based description of an image on a web page. It’s usually only visible when you examine the HTML source code, however, it also appears in place of an image when the image does not load.
Alt text is absolutely crucial for web accessibility, particularly for users of screen readers. These tools will read the alt text aloud so visitors who can’t see the images they are attached to can understand their purpose and what they contain.
Note that alt text should only be applied to meaningful images.
Meaningful images are the kind that contain important, useful, and critical information, like product photos.
The opposite of that are decorative images, which only exist for making things look pretty, such as background images or icons. They should not have an alt text and adding it can actually be distracting to screen reader users.
What should your alt text contain?
As a stand-in for a picture, alt text should ideally contain the same info as the image itself. That means, a clear description of what is visible in it. For example, on your main shop page:
- Bad alt text: “Levi’s Ranger”
- Good alt text: “Levi’s blue jeans 3/4 length model Ranger”
The second example makes it much clearer to screen reader users what is visible on the screen so they can make an informed decision whether it’s something they’d be interested in.
When creating alt text, try to put yourself in the shoes of your visitors who depend on this information and think about what is relevant for them. At the same time, try to be concise. It is best to use a maximum of 80-100 characters. A character calculator helps you to quickly find out how long your alt text is.
Adding alt text in WooCommerce
When it comes to using alt text on your WooCommerce site, there are several elements to familiarize yourself with. The most basic thing is to add it to all images in your media library. That way, alt text is automatically inserted when you set a product image, product gallery, or use it anywhere else on your website.
You gain access to this option either in the Media menu in the dashboard or whenever you access the media library from the WordPress editor. Here is an example of the latter:
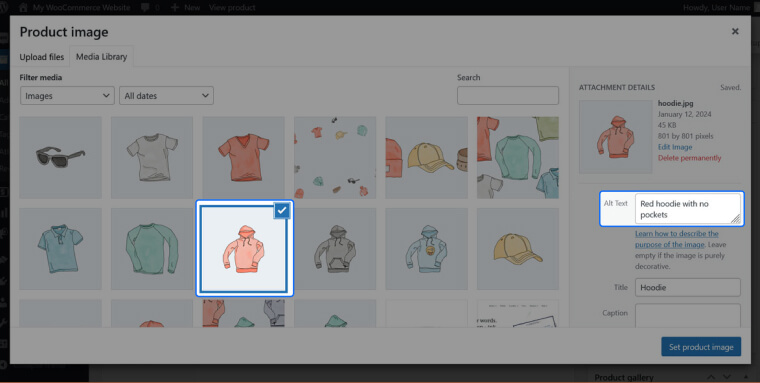
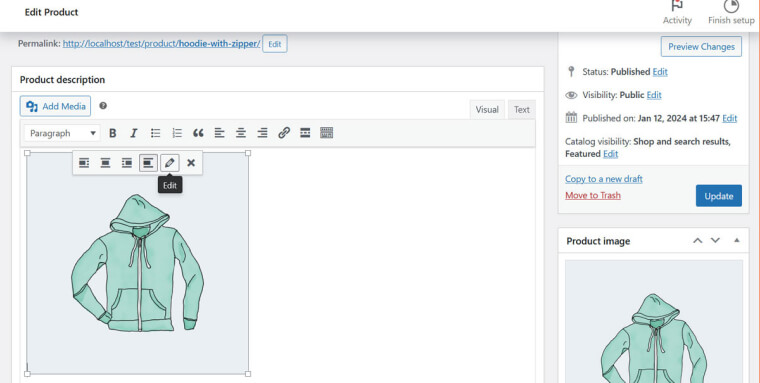
At the same time, you always have the option to change alt text locally for individual images. For example, when you add an image in a product description in the WooCommerce editor, you can press the Edit button to change the alt text for that instance:
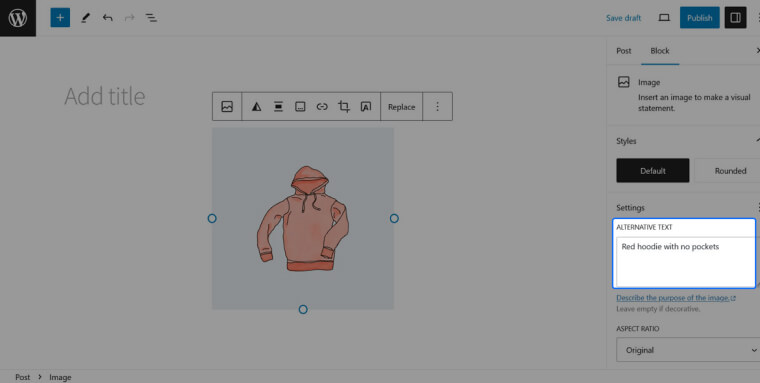
The same option exists in the sidebar of the WordPress block editor for creating pages and blog posts:
8. Make sure your fonts are legible
Font usage is another important aspect of web accessibility because fonts offer different levels of legibility. To ensure visitors with disabilities can properly access text-based content, check that the typefaces you use tick the following boxes:
- They are simple and familiar
- Their letters and characters are easy to distinguish
- Characters and lines have enough spacing in between
- Fonts are not excessively decorative or italicized
- Text appears in large enough size
- Its color has sufficient contrast to its background color
Popular accessible fonts include Arial, Calibri, Century Gothic, Helvetica, Tahoma, and Verdana. For more details, check our article on accessible fonts.
9. Provide sufficient color contrast
As already alluded to in the section about WordPress themes, color contrast plays an important role in accessibility. Any text appearing on your WooCommerce website needs to have a minimum contrast ratio of 4.5:1 with the background (3:1 for text above 18pt in size).
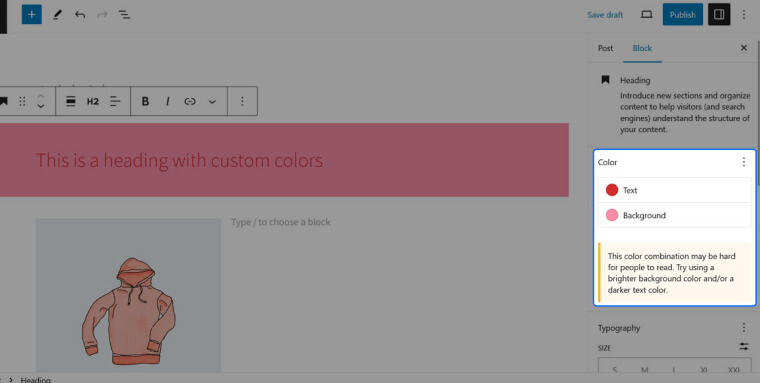
What’s neat about the WordPress block editor is that it automatically warns you if you make choices that don’t meet this threshold. You can see this in the following image, where it warns me that the red text and pink background are too similar to each other:
Be aware, however, that the WooCommerce product editor, which you need to use to set up the things you will sell in your online shop, does not have this feature. Here, you’ll need to manually check if your contrast is sufficient.
Important note: These color contrast requirements apply to meaningful non-text elements as well, such as graphical objects, interface components, and significant icons that are crucial to navigating and understanding your website and its content. Think home icons, menu icons, or input fields for online forms. Visitors with certain vision impairments need to be able to identify them as well.
It is worth noting that contrast restrictions do not apply to logos.
10. Use descriptive anchor text
Links are one of the main tools to get around a website. They are part of the navigation menu of an online shop and take visitors from the shop page to product pages. This makes them an important usability factor.
One of the most important steps in making links accessible is to use clear anchor text. That is the visible, clickable text that you see on the page as the link. In the following image, it is the part that says “Find out how” in the call to action on the main shop page.
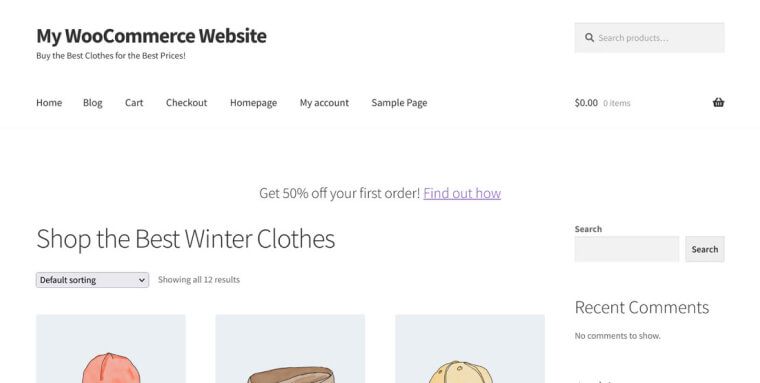
Just like sighted visitors, those using screen readers can skim content by jumping from one anchor point, such as headings and links, to the next. Therefore, be sure that the link anchor text makes sense in isolation. Even if someone were to read or hear it just on its own, they should understand where it takes them.
In the context of WooCommerce websites, this means that links should contain the names of the products whose pages they point to. It also means you should have clear labels for your shop’s navigation, categories, filters, and other links that are important for narrowing down choices.
The same goes for linked calls to action (CTAs). Avoid general CTAs like “click here” unless there is enough contextual information (or ‘clues’) that ensure screen reader users properly understand them.
11. Make sure your forms are accessible
Forms are essential to pretty much all online shopping experiences. They are the main tool to collect billing, shipping, payment, and other information from customers in order to finalize their orders.
If forms aren’t fully accessible, it is literally impossible for people with disabilities to finish their purchase. This is both discriminatory and bad business.
So, what should you do to ensure your forms are accessible?
- Properly label form fields: Add labels to your form fields that clearly state what information each field should be filled with. This is critical for screen readers
- Use placeholders the right way: Placeholders should not be used for labeling. Instead, their function is to show how to fill in the form fields (e.g. the correct email format)
- Make your forms keyboard-accessible: – It should be possible to navigate and fill them with just a keyboard
- Provide enough contrast: The same contrast requirements that we covered for text also apply to your web forms
- Avoid using just colors: To account for visitors who are color blind, instead of using only colors to show required form fields, include a label that says “required.” In the same vein, use icons, symbols, and error messages to indicate when something is wrong, not just colors either
12. Make sure your online documents are accessible
WooCommerce allows you to sell both physical and digital products. The latter often come in the form of documents, such as PDF e-books and other downloadables. In addition, you might have instruction manuals in the same format for your customers.
For the most part, ensuring that the online documents that are available (either via payment or by free download) are accessible, will entail following the same instructions that apply to the rest of your WooCommerce website. These include, but aren’t limited to:
- Ensure that all elements in the PDF are tagged
- Use readable, large fonts
- Provide adequate color contrast between text and background
- Add alt text for meaningful images
- Use descriptive link text
Adobe Acrobat and other PDF software, as well as Microsoft Office applications, all offer options for creating accessible documents. If you already have documents on your website that are not fully accessible, you will need to remediate them.
Should you have many documents and want to outsource this time-consuming process, you can rely on expert service providers like accessServices, who have intimate knowledge of WCAG and ample experience tackling large remediation projects. You can also find more information about creating accessible PDFs and PDF accessibility checkers on our blog.
13. Provide captions and transcripts for meaningful video content
Another popular digital product is online courses, which often come in the form of videos. You might additionally have other meaningful video content on your site, such as testimonials, product explainer videos, etc. Just like with images, meaningful videos are those that contain critical information and aren’t simply there for decorative purposes (e.g. video backgrounds).
To be accessible, all of these need to have captions.
Captions not only display what people on screen are saying but also describe non-speech elements like relevant sounds and sound effects.
In WooCommerce and WordPress, you can easily upload and display videos or embed them from external services like YouTube, Facebook, TED, Vimeo, and more. The latter is possible thanks to auto-embeds.
Regardless of the option you choose, captions are always necessary and it’s up to you to ensure they are accurate and consistent. This especially applies to auto-generated captions, which, for example, YouTube offers. If you want to rely on automatically-generated captions, you will need to review them, under WCAG.
Another important element for video accessibility are transcripts, which benefit both Deaf and blind people.
Transcripts convey all video content, spoken dialogue, and meaningful sounds. However, instead of appearing in the video, transcripts are provided separately, often below the video itself.
14. Use a web accessibility tool
Admittedly, implementing all of the above-mentioned accessibility guidelines on your WooCommerce site takes effort. And, even if you do your best to apply them, your website might still not be fully accessible.
To be on the safe side, it is highly recommended to integrate with a web accessibility plugin like accessWidget. With its AI-powered code audit, accessWidget can identify problematic areas from an accessibility standpoint and automatically apply adjustments. For example, it can add descriptive alt text and ARIA attributes where needed to ensure screen reader compatibility.
The plugin also provides visitors to your WooCommerce online shop with an interface to adjust design elements to fit their own abilities, including the possibility to adjust color contrasts, increase font size, and stop animations.
As mentioned earlier, accessWidget also integrates with WordPress website builders like Elementor and Divi, ensuring that any sites built with those platforms are fully accessible.
WooCommerce’s built-in accessibility features
WooCommerce is a WordPress plugin that adds e-commerce capabilities to the content management system. For that reason, the accessibility level of its parent platform also plays a role. If you want to know more about that, check out our guide on how to make WordPress accessible.
Here is what WooCommerce brings to the table in terms of accessibility:
Open-source plugin that allows for accessibility modifications
Just like the platform it runs on, WooCommerce is open source. In fact, all WordPress themes and plugins are published under the GPL license.
This is an asset as it gives you a lot of freedom to tweak the underlying code and page elements to adjust for accessibility. It means you can mold your WooCommerce-based online shop to the needs of your customers. You don’t have the same type of freedom with closed website-building platforms.
Commitment to continuous improvement
WordPress, WooCommerce’s parent platform, has a dedicated Accessibility Team, which leads efforts to make the software more user-friendly for people with disabilities. For example, they educate theme and plugin developers on implementing accessibility guidelines.
In addition, the WooCommerce makers themselves take accessibility seriously. As is visible in the WooCommerce Github repo, the creators regularly prioritize critical accessibility issues in the plugin’s development. Consequently, if you have a site just using the WooCommerce core plugin, in most cases, it should be enough for visitors with disabilities to go through with their purchase. However, as we will see below, other factors are at play that you need to take into account.
Powerful accessibility plugins
The WordPress environment offers many more plugins besides WooCommerce, including those that make your WooCommerce website more accessible.
accessiBe’s flagship tool accessWidget is one such solution. It easily integrates into your WooCommerce website and automatically audits its code for accessibility issues. If it identifies any issues, accessWidget will automatically fix (or remediate) the code, ensuring your website follows accessibility best practices. It even integrates with WordPress website-builder plugins like Elementor and Divi.
In addition, accessWidget comes with functionality that lets people with various disabilities adjust design elements to fit their own unique needs when they visit your site. These changes include changing font types and sizes, stopping animations, adjusting color contrasts, and enabling a text-only mode, among other options.
A deeper dive into WCAG
Despite being a long and complex set of guidelines, WCAG is ultimately based on four core principles:
- Perceivable: Website visitors should be able to perceive content appearing on your WooCommerce store using one or more of their senses
- Operable: Website visitors need to be able to operate your WooCommerce website regardless of their ability. An operable website needs to be navigable entirely by keyboard, sight-assisted navigation, and other alternatives to a classic mouse
- Understandable: Your WooCommerce site must be easy to understand. It should not feature overly technical terms or complex jargon, and should be devoid of complicated instructions that are difficult to follow
- Robust: For your WooCommerce website to be robust, it needs to use HTML and CSS according to specifications. It also needs to be compatible with assistive tools, like screen readers
It is important to note that, throughout the years, there have been a number of WCAG iterations:
The first version of these guidelines, WCAG 2.0, was published in 2008. An updated version, WCAG 2.1, was released in 2018. Finally, WCAG 2.2, the most up-to-date iteration of these guidelines, was officially published late in 2023.
WCAG 2.0, 2.1, and 2.2 all include three levels of conformance:
- Level A: The basic level of adherence
- Level AA: This level is commonly referenced in global accessibility regulations
- Level AAA: The highest level of conformance and the most challenging to achieve
It is recommended that your WooCommerce site meet WCAG 2.0 or 2.1 conformance at Level AA.
How do you achieve WCAG 2.1 Level AA conformance?
For your WooCommerce website to be considered WCAG 2.1 Level AA conformant, you must ensure it meets a number of technical and design requirements. These include, but certainly are not limited to:
- The ability to navigate solely via keyboard
- Compatibility with assistive tools like screen readers
- Alt text must be added to images of goods and services
- Captions and transcripts should be added to meaningful video content
- Text and its background color should sufficiently contrast
- Fully responsive design
The importance of an accessible WooCommerce website

Nearly one in five people worldwide live with a disability, including more than a quarter of adult Americans. Yet the vast majority of online stores remain inaccessible to them. A staggering 94% of the world’s largest e-commerce websites are not fully accessible. The number of WooCommerce stores represented in that statistic is substantial. As online store owners, it’s our responsibility to address and correct this unfair situation.
Moreover, embracing accessibility can yield tangible business benefits. Research highlights that the combined spending power of people with disabilities exceeds $13 trillion. By making your online store accessible to individuals with disabilities, and treating them with the respect they deserve, you allow them to browse your offerings and potentially become a paying customer.
Potential legal obligations
Businesses operating in the United States, Canada, or the European Union may be legally required to ensure their WooCommerce websites are accessible.
In the U.S., many courts interpret the Americans with Disabilities Act (ADA) as applicable to online spaces, often referencing WCAG as the necessary standard for web accessibility. Details on this can be found in our ADA website compliance checklist.
Government entities, federally-funded organizations, and those providing services to such groups must comply with Section 508 of the Rehabilitation Act. This law mandates that your WooCommerce site (and other digital communication technologies) align with WCAG 2.0 Level AA standards. Further information is available in our Section 508 website compliance checklist.
Businesses in Ontario, Canada, typically need to comply with the Accessibility for Ontarians with Disabilities Act (AODA). Under this law, your WooCommerce site needs to meet WCAG 2.0 Level AA standards. Our AODA website compliance checklist offers more insights into these requirements.
How to test your WooCommerce website for accessibility
There are readily available ways in which you can determine your WooCommerce website’s level of accessibility (and compliance with relevant web accessibility laws). You can use automated testing tools, such as accessScan, and rely on expert service providers, like accessServices.
To use accessScan, you need to submit your online store’s URL. accessScan will then run a quick, automated audit of your web page and check whether it conforms to WCAG 2.1 Level AA. Once the audit is complete, you will be given detailed results that will help you address website elements that are non-accessible (if any exist).
You can also rely on web accessibility experts, like accessService, to manually audit and remediate your WordPress website. Given that WooCommerce websites are often more complex, involving an expert service provider to thoroughly inspect them for compliance issues can yield optimal results.
It is very important to note that these testing methods complement each other.
WooCommerce website owners routinely rely on automated tools for an initial audit of their websites. Then, they turn to expert service providers to help examine and remediate accessibility issues.
Closing thoughts
Making your WooCommerce website accessible is a complex process. While the plugin and its parent platform offer a great foundation, there are still many accessibility best practices to pay attention to. Accessibility is an ongoing process, not something you do once and forget about. It requires continuous vigilance.
Therefore, if you need some extra support or just want to ensure you are not forgetting something vital, consider turning to accessWidget for extra assistance to help you automate the process.
Frequently asked questions about WooCommerce website accessibility
Q1. What does accessibility mean for a WooCommerce store?
A1. It means that every visitor—including those using assistive technologies—can browse, select products, checkout and interact with the site without barriers. Accessible WooCommerce stores follow the Web Content Accessibility Guidelines (WCAG 2.1 Level AA) so that users with disabilities have comparable experiences.
Q2. Which key areas of a WooCommerce store typically need attention for accessibility?
A2. Major focus areas include: selecting an accessibility-ready theme; ensuring keyboard navigation works end to end (especially in product search, filter, cart and checkout flows); adding descriptive alt text for product images; ensuring forms and buttons are labelled and operable; providing captions/transcripts for media; and maintaining colour contrast and readable typography.
Q3. How important is theme and plugin selection for WooCommerce accessibility?
A3. Very. Themes and plugins control functionality and design which can introduce accessibility barriers if they are not designed for inclusive use. Choosing themes marked “accessibility-ready” and testing plugins for keyboard and screen-reader compatibility gives you a stronger foundation—but you still need to audit and remediate as necessary.
Q4. How can a WooCommerce store owner test their site for accessibility?
A4. Use a mix of automated tools (e.g., colour-contrast checkers, accessibility linters, plugins) and manual testing: navigate the site using Tab only, test with screen-readers, verify alt text on images, check label-association on form fields, review error states and ensure checkout is fully operable without a mouse. Document your findings.
Q5. What are common barriers in WooCommerce stores that exclude users with disabilities?
A5. Examples include: image-only product descriptions without alt text; dropdown or filter interfaces inaccessible by keyboard; poor colour contrast on buttons or links; product pages that trap focus or fail screen-reader logic; checkout flows with unlabeled fields; videos or guides without captions or transcripts.
Q6. Does accessibility improve business outcomes for WooCommerce stores?
A6. Yes. Making your store accessible expands your potential customer base (including people with disabilities), can improve SEO and conversion by making content clearer for all users, reduces legal risk around accessibility claims, and enhances brand credibility by showing commitment to inclusion.
Q7. How often should a WooCommerce store review accessibility status?
A7. Regularly. Every time you add new products, themes or plugins, update layouts or alter checkout flows, you should re-audit. Accessibility isn’t a one-off fix—it should be embedded into your workflow with milestones for review, remediation and documentation.
Q8. How can accessiBe support WooCommerce store accessibility?
A8. accessiBe offers solutions tailored for WooCommerce: its accessWidget plugin helps automate scanning and remediation of accessibility issues; it supports keyboard navigation, alt-text tagging, and UI adjustments to align with WCAG 2.1 Level AA. The tool is designed for stores seeking efficient accessibility compliance while maintaining design and functionality.