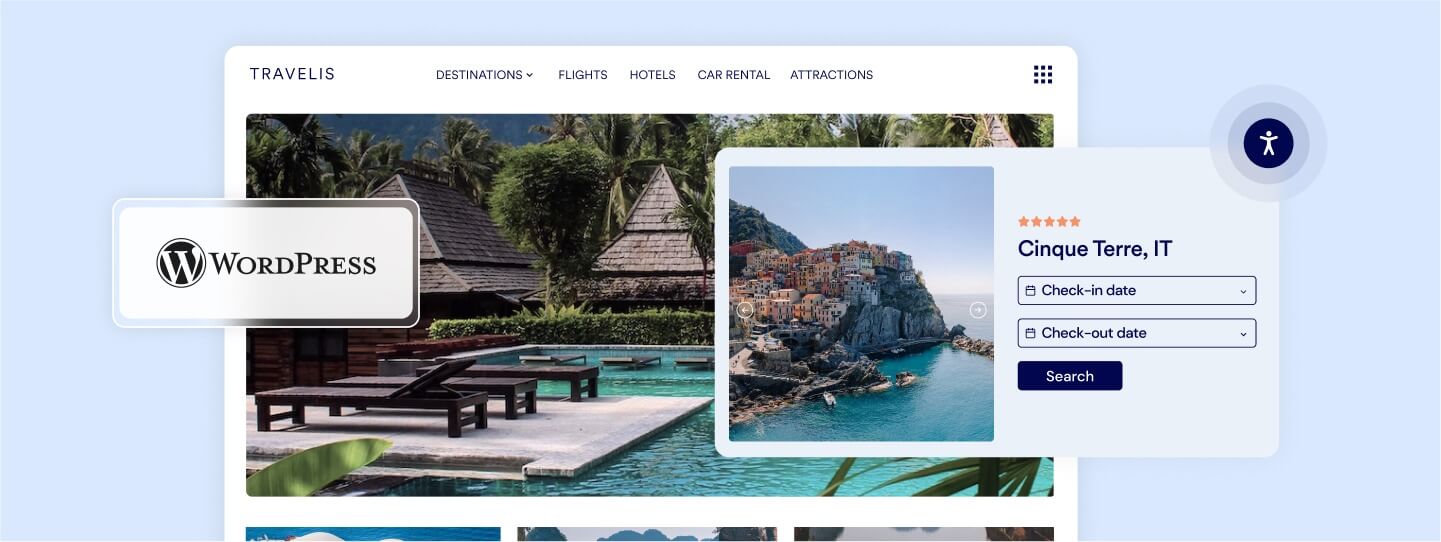
WordPress is the most successful content management system in the world, powering more than 43% of the entire internet. Consequently, it’s also one of the primary platforms that people with disabilities encounter when surfing the web. Therefore, it’s very important that you, as a WordPress website owner, designer, or administrator, know how to make your WordPress website accessible.
In this blog post, we will show you how to make your WordPress website accessible to people with disabilities. The post will illustrate the importance of web accessibility and explore how accommodating visitors of all abilities can lead to positive business results.
Key steps for making your WordPress site accessible
- Choose an accessible theme
- Use the right plugins
- Display your site title and tagline
- Apply ARIA attributes
- Use appropriate headings
- Add alt text to meaningful images
- Include captions and transcripts for videos with audio content
- Use legible fonts
- Select contrasting colors
- Use descriptive anchor text
- Make sure that your online documents are accessible
- Integrate with a web accessibility tool
What does having an accessible WordPress website mean?
Creating an accessible website with WordPress means that all visitors, including those with disabilities, can navigate and interact with your website effectively. To achieve this, your WordPress website needs to adhere to established web accessibility standards. These standards include specific guidelines that, when followed, ensure that your WordPress website is configured and designed to provide an equitable browsing experience for the disability community.
The most important set of web accessibility guidelines are the Web Content Accessibility Guidelines (WCAG). Developed by the World Wide Web Consortium (W3C), WCAG serves as a comprehensive framework with multiple success criteria that your WordPress website should meet.
WCAG is founded on four core principles:
- Perceivable: Your WordPress website’s content must be perceivable through multiple senses, including sight, sound, and touch
- Operable: People should be able to navigate and use your WordPress site regardless of their abilities. This means that your WordPress website needs to allow for keyboard navigation, navigation aided by screen readers, and alternative methods for mouse-based interactions
- Understandable: The content appearing in your WordPress website should be easy to comprehend. To that end, you should avoid complex jargon and technical language. The instructions you provide should be clear and straightforward
- Robust: A robust WordPress site is compatible with assistive tools like screen readers and adheres to HTML and CSS standards
The three versions and levels of WCAG
Over the years, several iterations of WCAG have been released:
- WCAG 2.0 was published in 2008
- WCAG 2.1, an updated version, was released in 2018
- WCAG 2.2, which was officially published late in 2023
WCAG 2.0, 2.1, and 2.2 all include three levels of conformance:
- Level A: The basic level of adherence
- Level AA: This level is commonly referenced in global accessibility regulations
- Level AAA: The highest level of conformance and the most challenging to achieve
It is recommended that your WordPress website conforms to WCAG 2.1 or 2.2 Level AA.

What does achieving WCAG 2.1 and 2.2 Level AA conformance entail?
To align with WCAG 2.1 or 2.2 Level AA, your WordPress website needs to fulfill numerous technical and design-based prerequisites. Some of these requirements include:
- Keyboard-only navigation support
- Compatibility with screen reader tools
- Responsive design to ensure usability on various devices
- Sufficient contrast between text and background colors
- Ensuring online documents are accessible to people with disabilities
These are just a few aspects that contribute to making your WordPress site accessible. A more detailed exploration of these requirements will follow.
How to make your WordPress website accessible: a deep dive
Ensuring your WordPress website is accessible is a multi-step process. For it to prove successful, this process must account for a variety of disability and impairment categories.
There are people with hearing impairments, different visual disabilities like blindness, partial blindness, and color blindness, seizures, limited mobility and motor problems, neurological issues, speech impairments, and more. Each of these conditions presents particular challenges for making a WordPress website accessible and can require addressing different website elements.
So, here are the steps you should take to make sure your WordPress website meets the mark. You can press on each action item to skip straight to a dedicated section in which it is elaborated upon.
- Choose an accessible theme
- Use the right plugins
- Display your site title and tagline
- Apply ARIA attributes
- Use appropriate headings
- Add alt text to meaningful images
- Include captions and transcripts for videos with audio content
- Use legible fonts
- Select contrasting colors
- Use descriptive anchor text
- Make sure that your online documents are accessible
- Integrate with a web accessibility tool
1. Choose an accessible theme
In WordPress, themes are what control the design of your website. They contain colors, fonts, layouts, design elements, and more. Essentially all the components that contribute to how a website looks. Once you select one, you can adapt your theme to give your website a new appearance and also change themes entirely for a completely new look.
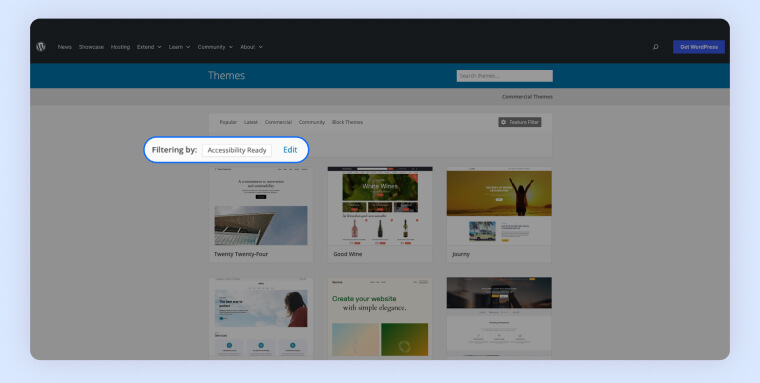
Themes also play an important role in WordPress accessibility. As you will see below, design can greatly influence how usable a website is for people with disabilities. For that reason, one of the most important steps is to choose a theme that is labeled as “accessibility ready.” This label means the theme has been tested for accessibility standards. You can filter for this in the official WordPress theme directory as well as third-party shops like ThemeForest.
Here’s how searching for accessible themes in the WordPress directory looks like:
Themes are generally considered accessible when they incorporate the following elements:
High contrast ratios
Ensuring sufficient contrast between text and its background color is critical to allow for people with certain vision impairments to properly access content on your WordPress website. The minimum contrast requirement under WCAG is 4.5:1 for normal text and 3:1 for large text (more than 18pt). You can use a tool like the Adobe Color Contrast Analyzer to see if your chosen colors meet this threshold. Contrast requirements also extend to buttons, hyperlinks, and any other element with text. You can learn more about it in our article on selecting accessible color schemes.
Mobile responsiveness
Responsive design sees to it that your website automatically adapts to different screen sizes. That way, elements are properly displayed no matter what device a person uses to view it and in which orientation – portrait or landscape.
Responsive design is also critical for accessibility. One of responsive design’s main principles is using relative instead of static sizes. This, for example, helps people with vision impairments who increase the default font size in their browser to make websites easier to read. The relative sizes help preserve the overall look of your website when this change occurs and also maintain the order in which content appears.
They allow for keyboard navigation
Not all WordPress themes inherently offer keyboard-only navigation. While creating a website, it’s important to ensure that the tab order is correct and that drop-down menus function properly when operated solely via a keyboard. In order to do that, the best way is to simply test your website yourself. Open it in a browser and try to navigate the site using the TAB key. See if it is possible to access all the content or if you get stuck somewhere. Any difficulties you experience, your visitors who depend on keyboard navigation will also run into. You should be specifically wary of themes that use custom drop-down menus, which may not be accessible without a mouse or trackpad in their default mode.
Elementor, one of the most popular WordPress page builder plugins, has made sure that any form created with their plugin is perfectly usable via keyboard. Divi, another page builder, allows you to add a “skip to content” link that allows people to jump over the header section and menus and get directly to the important parts. You can find accessibility-ready themes for these two plugins at ThemeForest.
Important note: Just because a theme is branded as accessible, it doesn’t automatically mean it is. You need to do your due diligence to make sure a given theme actually delivers on what it promises.
2. Use the right plugins
Plugins are another pillar of the WordPress ecosystem. Installing them on your website allows you to add more functionality and features to it. Plugins vary in complexity and in what they do. There are simpler plugins that allow you to add elements like image galleries to your WordPress website, and far more complex plugins, such as WooCommerce, that will help your website become an online shop.
You need to examine any plugins you are considering for their accessibility.
This is especially true if you plan on adding visual elements to your WordPress website, like quizzes and sliders, along with more commonly-appearing elements, such as forms. Your website visitors also need to be able to control time limitations. If you select a plugin that logs website visitors out of your website after a period of inactivity for security reasons, you need to make sure visitors are notified of this.
Additionally, you need to ensure that website visitors can request more time and that they won’t lose session data by doing so. If you select a plugin that prompts pop-ups or ads, you need to double check they don’t flash more than three times per second. These kinds of effects pose a risk for visitors with epilepsy, and should be avoided.
Because there are such diverse requirements for making a website accessible, you really have to make an effort to ensure any WordPress plugins you use conform fully to WCAG guidelines.
3. Display your site title and tagline
Your site title and tagline matter because they help visitors identify the topic and content of your web pages. They also make web pages easier to find in search results and sitemaps, and help people differentiate between web pages when there are multiple pages open in their browsers.
For that reason, you should ensure your web pages have accurate and complete titles and taglines.
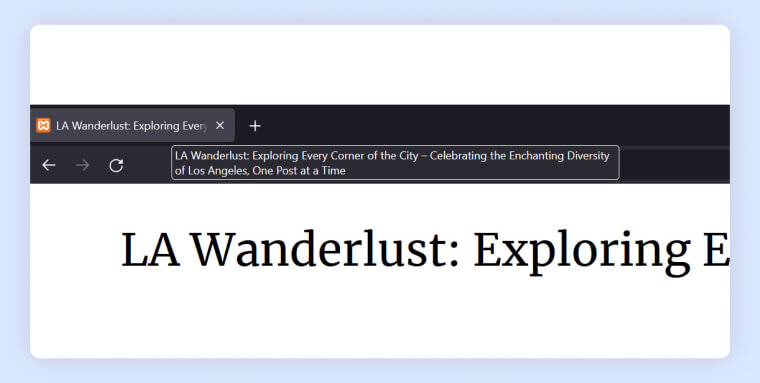
How to check whether your titles appear:
Open your web page in a browser and hover over its tab to see the title and tagline:
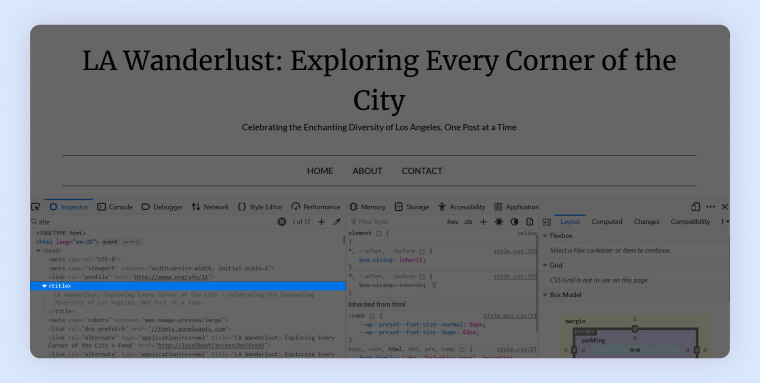
You can also use the browser developer tools and look for the <title> and <meta name=”description”> tags in the HTML:
How to add your site title and tagline
There are several ways for you to add your site title and tagline. For your homepage and website in general, the easiest way is to go to Settings > General in the WordPress back end. Here, you will find the fields for site title and tagline at the top:
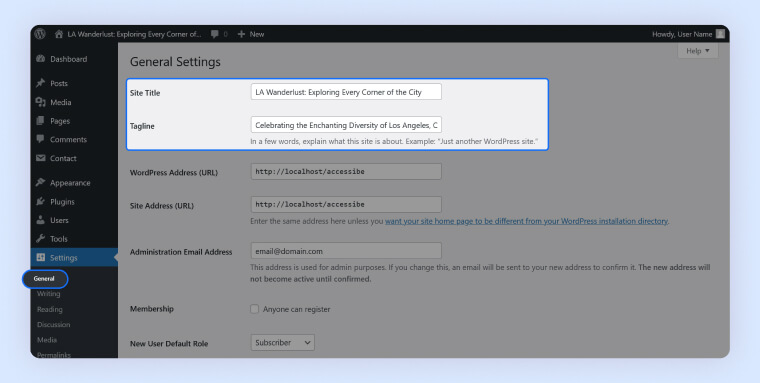
Check whether the information here is appropriate. If not, and you make changes, be sure to save them at the bottom. For all other posts and pages, you set the page title at the top of the WordPress editor.
4. Apply ARIA attributes
ARIA attributes can be added to HTML code to explain the function and content of different elements to people who use assistive technology, specifically screen readers. They provide extra context for how a web page is laid out, what’s inside it, and convey additional information regarding parts of its UI. For example, certain ARIA attributes are used to convey the state of components, like the opened state of dropdown menus and accordions, and the checked state of custom checkboxes.
What’s important to note here is that screen readers are already adept at understanding native semantic HTML such as <nav>, <button>, <input>, or <a>. ARIA comes into play for website parts that semantic roles do not exist for, or to provide additional information for users of assistive technology regarding custom elements. Examples include form hints or error messages.
If you followed the first item in our checklist, you will have selected an accessible WordPress theme. For it to be considered accessible, the theme has to use proper semantic HTML and will come with ARIA attributes already built in.
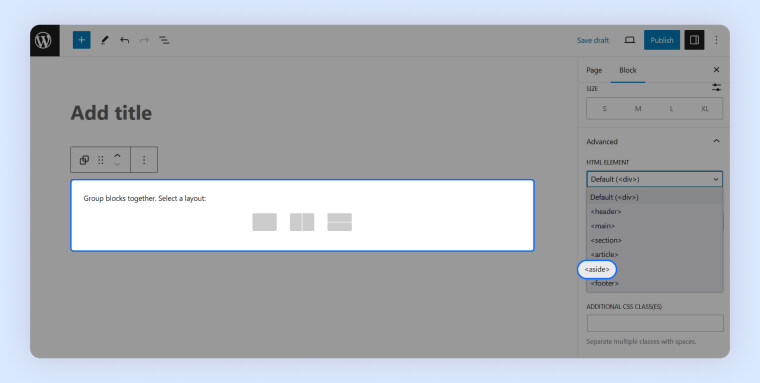
The default WordPress editor also automatically adds ARIA markup to its blocks where appropriate. Plus, for content elements that create extra HTML code, such as the Group block, you can assign appropriate semantic names to the HTML. As mentioned above, this helps screen readers correctly navigate the layout of your web pages. To do so, you will need to navigate to the group block. Then, on the right, you will need to select the appropriate element from the drop-down menu entitled ‘HTML ELEMENT’:
However, as mentioned above, even so-called accessible themes can lack complete and accurate ARIA labels. And, unfortunately, unless you are a developer who can work with the underlying code, there is no easy manual way to assign ARIA attributes inside WordPress. This makes it even more important to consider an accessibility plugin like accessWidget that automatically detects missing ARIA and then applies the necessary markup to inaccessible elements.
5. Use appropriate headings
Headings provide structure for written online content. They break up blocks of text, introduce the topics of various sections appearing on a web page, and provide website visitors with an overview of the content layout. You can see this in this very blog post, which makes ample use of headings.
Headings are also critical for accessibility since they make it easier for people with disabilities to consume content. They are especially important for screen reader users, as these tools announce when a given heading tag has been applied. This allows users to understand the structure of the content piece they are engaging with, and to assess its importance within the context of the rest of the web page.
It’s also crucial that you use actual heading tags instead of simply bolding text and/or increasing its font size. Screen readers use the actual HTML markup, not the visual appearance of text elements, to determine page structure.
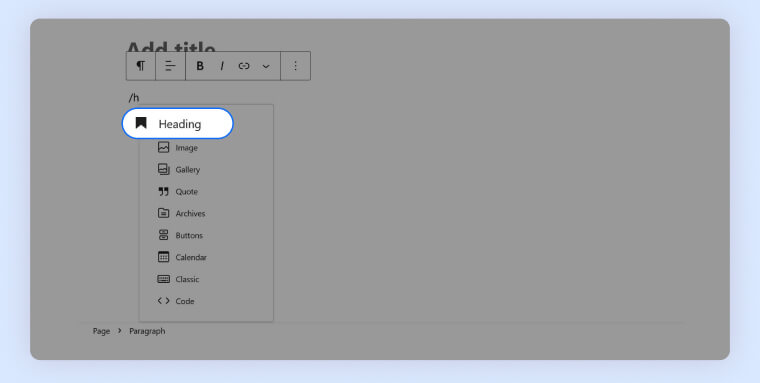
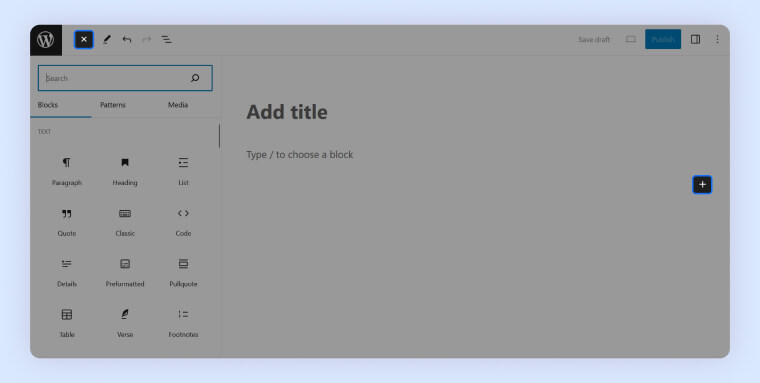
To apply headings in WordPress, you can simply input the Heading block in the editor. The easiest way to do so is to use a slash forward (“/”) and then start typing its name:
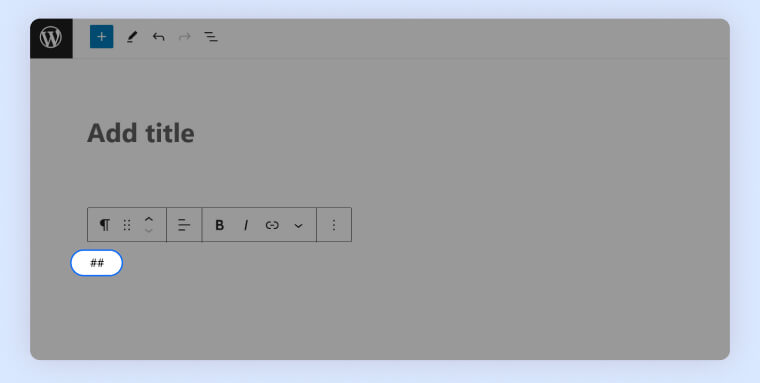
Alternatively, you can create headings by typing the # sign at the beginning of a new line and then hitting the spacebar. Inputting ## creates an H2 heading, ### an H3, and so forth:
Besides that, you can also use the buttons for inputting blocks inside the editor:
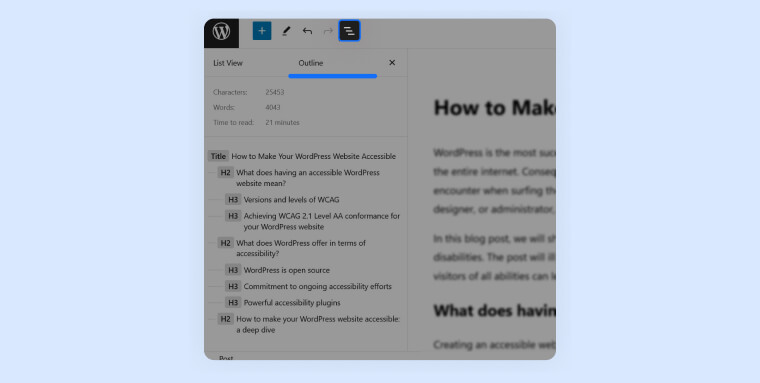
Additionally, once you’ve added them, the entire heading structure of your pages shows up in the Outline menu inside the list view. You can access this area by clicking on the “List View” icon at the top toolbar of the editor. It usually appears as a list or stack of lines:
6. Add alt text to meaningful images
Alt text is a text-based description assigned to an image on a web page. You can usually only see it when you examine the HTML source code of a website, or when it appears in place of an image that did not load. Alt text is critical for web accessibility, particularly for people with vision impairments who rely on screen readers. These tools will read the alt text out loud to allow users to understand the content of an image.
It is important to note that alt text should only be added to meaningful images. Meaningful images provide readers with important, useful, and critical information. Decorative images, on the other hand, exist purely for making things look good. Examples include background images, icons, or stock images that only add atmosphere. Decorative images should be hidden from assistive technology. To that end, you should leave an empty alt tag for non-meaningful images.
What should your alt text contain?
Alt text should be an accurate description of the content conveyed in the image. Make sure to also clarify what that image and its content mean within the context that the image appears. A good approach is to consider what information would make sense to display in text-only form at the position of the original image. You could also consider including a caption with your images for additional details.
As for how long your alt text should be, it is best to keep it between 80 to 100 characters. You can use a character calculator to quickly figure out how long your alt text is.
Important note: If the image is more complex and cannot be summarized adequately within the character limit, you can also use the image’s alt text to direct people to a section of the page that expands on the information appearing in the image.
How to add alt text to meaningful images in WordPress
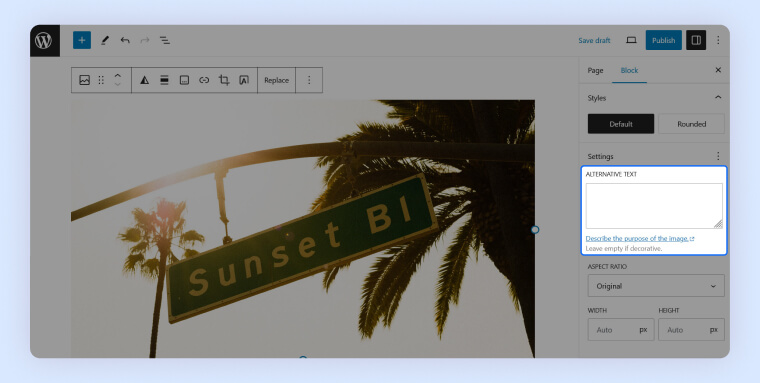
Adding alt text to meaningful images in WordPress is straightforward and easy. Simply select an image block and then input the alt text in the block settings in the sidebar:
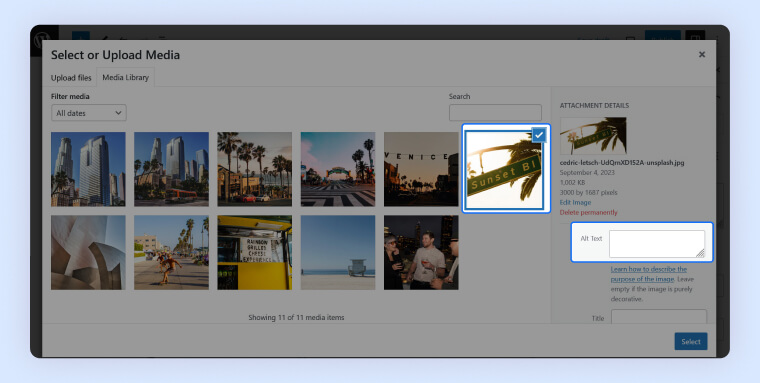
You can also add alt text to images directly in the media library. That way, the alt text will automatically appear on the page when the image is used:
7. Include captions and transcripts for videos with audio content
If your WordPress features meaningful video content (i.e., the kind that conveys vital, important information) it needs to have captions. Captions are like subtitles for a movie. They display what people on screen are saying but also describe non-speech elements like relevant sounds and sound effects. It is important to note that captions are specifically for videos with audio content. Slideshows and screen recordings that do not feature audio do not need captions.
You can feature videos on your WordPress website using just about any video player and platform. Many WordPress website owners rely on YouTube and embed their videos in WordPress using auto-embeds. You can do the same with other websites and media such as videos from Facebook, TED, Vimeo, or DailyMotion. Regardless of the video platform you use, be sure that the captions it provides are accurate and consistent. This is especially true for auto-generated captions, which are not always completely accurate. If you want to rely on automatically-generated captions, you will need to review them, under WCAG.
Another important element you will need to provide to ensure videos are accessible are transcripts.
Transcripts are similar to captions. However, instead of appearing in the video, they are a complete write-up of the video’s content and appear as a separate block of text. This includes both the spoken content and a description of the non-speech audio and visual information featured in the video. Transcripts benefit people who are both deaf and blind and often appear below the video in question.
8. Use legible fonts
Fonts are an integral part of web design. However, some of them are more legible than others and can therefore contribute to or hurt the accessibility status of your WordPress website.
What makes fonts accessible?
- They are simple and familiar
- Their letters and characters are easily distinguishable
- There’s enough spacing between characters and lines
- They are not excessively decorative or italicized
Obviously, even when selecting an accessible font, you need to ensure that:
- It appears in large enough size
- Its color has sufficient contrast to its background color
Popular examples include Arial, Calibri, Century Gothic, Helvetica, Tahoma, and Verdana. For more details, check out our article on accessible fonts.
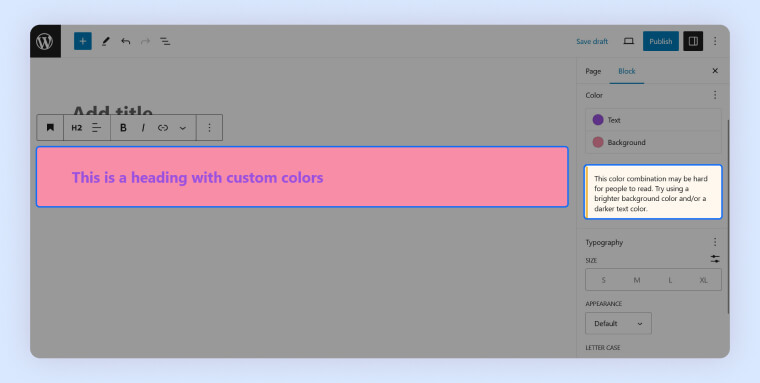
9. Select contrasting colors
As we mentioned above, color contrasts are a crucial component of web accessibility. You need to make sure that the text appearing on your WordPress website sufficiently contrasts with its background color. Under WCAG, the minimum contrast ratio for normal text is 4.5:1 and 3:1 for text above 18pt in size. The WordPress editor now automatically warns you if your written content and its background color are too close to each other to be readable:
It is important to note that these color contrast requirements need to be applied to meaningful non-text elements, as well. Non-text elements are graphical objects that convey information, interface components, and significant icons that are instrumental in using and understanding your website and its content. Examples of such elements include social media icons, input fields for online forms, and the focus indicator. These all need to be clearly distinguishable, even with a color vision deficiency. Note that contrast restrictions do not apply to logos.
10. Use descriptive anchor text
Links are one of the main tools for navigating through websites. As such, they have a big influence on website usability, both for people with disabilities and for those outside the disability community.
It is therefore very important to use clear anchor text.
Anchor text is the visible, clickable text in an HTML link, usually appearing underlined and in a different color than the rest of the content surrounding it. Anchor text that adheres to accessibility best practices will clearly indicate where the link will take website visitors if they click on it. Avoid links where the anchor text simply says something like “Read more” or “Shop now”. Be specific. Screen reader users don’t have the same context when interacting with links as visitors who can see the page have.
The same goes for linked calls to action (CTAs). Avoid general CTAs like “click here.” Instead, provide context, and use anchor text like “learn more about our products.”
11. Make sure that your online documents are accessible
If your WordPress website features online documents, such as PDFs and Microsoft Office files (e.g., PowerPoint presentations and Word documents), you need to ensure they are fully accessible. For the most part, that involves making them compatible with screen readers. To do so, the content of your documents needs to be properly tagged and follow other accessibility best practices:
- Use readable, large fonts
- Apply adequate color contrast between text and background
- Add alt text for meaningful images
- Use descriptive link text
- Refrain from using images instead of text to convey critical information
- Maintain a logical reading order throughout the document
Basically, many of the same things that also apply to your WordPress website.
The good news is that you can use Adobe Acrobat and other PDF software as well as Microsoft Office applications for creating accessible documents. If the online documents already on your website aren’t fully accessible yet, you will need to remediate them. This can prove challenging, time-consuming, and costly for website owners, especially if you have a large number of documents that require work.
Many WordPress website owners choose to outsource document remediation projects to expert service providers, like accessServices. With an intimate knowledge of WCAG and its application to online documents, these experts are better equipped to deal with lengthy and complex remediation projects. You can also find more information about creating accessible PDFs and PDF accessibility checkers on our blog.
12. Integrate with a web accessibility tool
While you absolutely need to implement all of the accessibility best practices mentioned above, there is a good chance your WordPress website will still not be fully accessible. Simply identifying all of its inaccessible code and design elements may prove challenging enough in itself, let alone correcting or remediating them.
Therefore, it is highly recommended to integrate with a web accessibility plugin like accessWidget. Leveraging AI, accessWidget runs an automatic audit of your WordPress website’s code, identifying problematic areas from an accessibility standpoint. Then, it applies the necessary adjustments, such as adding descriptive alt text to meaningful images and ARIA attributes to relevant HTML elements. This ensures screen reader compatibility and keyboard navigation.
accessWidget also provides your WordPress website visitors with an interface through which they can adjust design elements themselves to fit their own abilities. Examples of such changes include adjusting color contrasts, increasing font size, and stopping animations.
It is important to note that accessWidget integrates with WordPress website builders like Elementor and Divi, ensuring that any sites built with those platforms are fully accessible.
You can click here to install the accessWidget plugin on your WordPress website.
What does WordPress offer in terms of accessibility?
As a first step, let’s look into WordPress’ built-in accessibility features.
- WordPress is open-source: WordPress is not proprietary software. Rather, it is an open-source project. Consequently, you are completely free to tweak the underlying code and website elements to implement accessibility features. On other website-building platforms, you are far more dependent on built-in functionality and features
- Commitment to ongoing accessibility efforts: WordPress has a dedicated accessibility team that works to ensure the platform becomes more user-friendly for people with disabilities. The team also shares insights to help developers improve the accessibility level of their websites and plugins. The team tries to increase the accessibility of WordPress’ core system with each new version release
- Powerful accessibility plugins: One of the main draws of WordPress is its huge plugin environment. Over 59,000 plugins exist for all kinds of purposes, including some to make your WordPress website accessible, such as accessiBe’s accessWidget. accessiBe’s flagship tool can be easily integrated into your WordPress website, after which it automatically audits your website’s code to detect accessibility issues that might exist within it. Once these issues are identified, accessWidget will automatically fix (or remediate) the code, ensuring your website is accessible. You can even integrate accessWidget with WordPress website-builder plugins like Elementor and Divi. accessWidget also empowers visitors to adjust your WordPress website themselves. When engaging with your website, people with various disabilities can use accessWidget’s interface to tweak design elements to fit their own unique needs. This includes changing font types and sizes, stopping animations, adjusting color contrasts, and enabling a text-only mode, among other cool options. You can press here to learn more about how accessWidget can help make your WordPress website accessible
Why you should care about making your WordPress website accessible

Despite close to a fifth of the world’s population living with some form of disability, online environments, by and large, are not equally accessible to everyone. 96.3% of websites have minor to severe accessibility issues that deny members of the various disability communities access to vital information and opportunities. It is on us, as website owners, to remedy this inequitable reality.
It is worth noting that doing so can also lead to positive business results. A recent study found that members of the various disability communities have a collective spending power of over $13 trillion. When you welcome people with disabilities to your website, you allow them to spend their money on your goods and services.
Web accessibility legal obligations
If you are a business operating in the United States of America, Canada, or the European Union, you may be mandated by law to ensure your WordPress website is accessible.
Many U.S. courts apply the Americans with Disabilities Act (ADA) to the online domain, and point to WCAG as the standard websites need to conform to in cases involving web accessibility. You can read more about that in our ADA website compliance checklist.
If you are a government body, a federally-funded organization, or a service provider to such organizations, you need to comply with Section 508 of the Rehabilitation Act. Under this law, your WordPress website (along with other forms of information and communication technology) must conform to WCAG 2.0 Level AA. You can read more about that in our Section 508 website compliance checklist.
If you are a business that is registered in the province of Ontario, Canada, you will likely need to comply with the Accessibility for Ontarians with Disabilities Act (AODA). Under this law, your WordPress website must conform to WCAG 2.0 Level AA. You can read more about AODA compliance requirements in our AODA website compliance checklist.
How to test your WordPress website for accessibility
There are readily available ways in which you can determine your WordPress website’s level of accessibility (and compliance with relevant web accessibility laws). You can use automated testing tools, such as accessScan, and rely on expert service providers, like accessServices.
To use accessScan, you need to submit your WordPress website’s URL. accessScan will then run a quick, automated audit of your web page and check whether it conforms to WCAG 2.1 Level AA. Once the audit is complete, you will be given detailed results that will help you address website elements that are non-accessible (if any exist).
You can also rely on accessService to manually audit and remediate your WordPress website as. A significant number of WordPress website owners rely on accessServices to conduct a thorough audit of their website and then to make the necessary tweaks and adjustments to ensure they are fully accessible.
It is very important to note that these testing approaches are complementary. Very often, WordPress website owners routinely rely on automated tools for an initial audit of their websites. Then, they turn to expert service providers to help examine and remediate accessibility issues.
Frequently asked questions about WordPress website accessibility
Q1. What standards should a WordPress website meet for accessibility?
A1. While the Americans with Disabilities Act (ADA) does not specify a technical standard for websites, the recognized benchmark is the Web Content Accessibility Guidelines (WCAG) 2.1 Level AA, which ensures digital content is perceivable, operable, understandable, and robust.
Q2. What are some foundational steps to make a WordPress site accessible?
A2. Start by selecting an “accessibility-ready” theme, adding alt text to meaningful images, ensuring video captions, maintaining sufficient color contrast, structuring content with clear headings, and verifying full keyboard navigation.
Q3. What role do themes and plugins play in WordPress accessibility?
A3. Themes control the site’s structure and code quality, while plugins add features that can enhance accessibility. Choosing accessibility-ready themes and reputable plugins helps establish a compliant, user-friendly foundation.
Q4. Does accessiBe have a plugin for WordPress?
A4. Yes. accessiBe offers a dedicated WordPress plugin that seamlessly integrates its AI-powered accessWidget into your website. The plugin automates accessibility scanning and remediation, helps maintain ongoing WCAG 2.2 Level AA conformance, and provides visitors with a personalized accessibility interface for an inclusive browsing experience.
Q5. How does accessiBe’s WordPress plugin support ongoing ADA compliance?
A5. The plugin performs continuous, automated scans to detect accessibility issues as your site evolves. It complements manual testing by maintaining accessibility between updates, providing documentation, and offering optional litigation-support services when needed.
Q6. How should a WordPress site be tested for accessibility?
A6. Combine automated and manual testing. Use screen readers to verify navigation, check alt text accuracy, confirm color contrast ratios, ensure logical heading order, and test mobile responsiveness.
Closing thoughts
Making your WordPress website accessible means covering a lot of bases. While the platform offers some great out-of-the-box functionality including accessibility-ready themes, there are still things to consider, check, and implement.
From carefully choosing plugins over structuring content and providing assistance, to making sure your content is legible, accessibility is an ongoing process, not a one-off task. Therefore, it should be an integral part of your website planning and maintenance process.